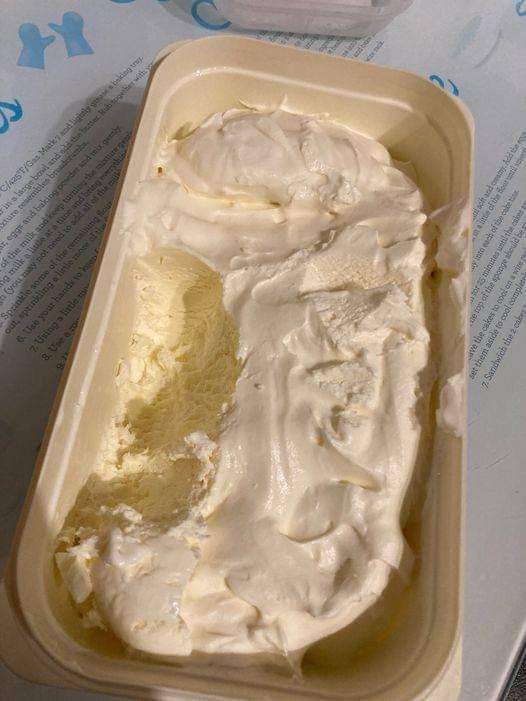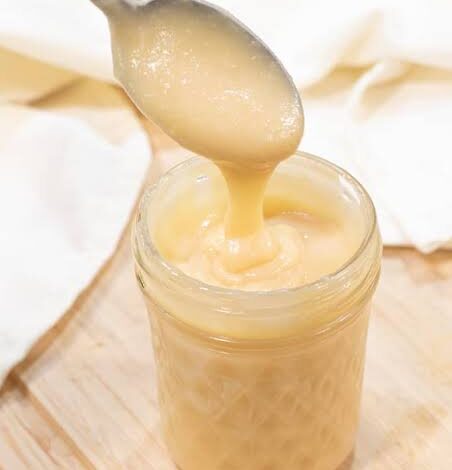
Have you ever wondered how to make that magically thick, sweet, and golden liquid that sits in little metal cans on grocery store shelves? This homemade sweetened condensed milk recipe is your ultimate guide to creating this kitchen staple right in your own cozy home with just two very simple ingredients that you probably already have in your kitchen pantry. Sweetened condensed milk is essentially fresh whole milk that has been cooked down slowly until most of its water content has evaporated, leaving behind a rich and concentrated milk base which is then sweetened to absolute perfection. This recipe is all about simplicity, patience, and the joy of watching everyday ingredients transform into a decadent treat that can elevate your baking to a whole new level. By choosing to make this classic ingredient yourself, you are stepping away from the processed canned goods and stepping into a kitchen world where you control the quality, the sweetness, and the overall flavor of your food. It is a fundamental recipe that every single home baker, whether a complete beginner or a seasoned expert, should have in their recipe book because it serves as the sweet backbone for hundreds of delicious desserts around the world.
People absolutely adore this homemade sweetened condensed milk recipe because it feels like a culinary magic trick that is incredibly satisfying to complete. There is something deeply comforting about standing over a warm stove, gently stirring a pot of milk and sugar, and watching it slowly deepen in color from a pale white to a beautiful, warm, creamy ivory hue. Unlike the store bought cans which can sometimes have a metallic aftertaste or contain mysterious stabilizers and preservatives to keep them shelf stable for years, this homemade version tastes incredibly fresh, clean, and intensely milky. It has a rich caramel undertone that you simply cannot find in a factory made can, and the texture is so silky smooth that you will want to eat it straight off the spoon. Food lovers and home cooks also cherish this recipe because it is highly customizable, allowing you to adjust the thickness, change the level of sweetness, or even make dairy free versions using plant based milks if you want. It brings a sense of pride and nostalgic joy to your cooking space, reminding us all that the very best things in life are often made from scratch with patience and love.
This is the perfect recipe to whip up when you are planning a special weekend baking project, preparing for holiday gatherings, or simply craving a sweet escape on a quiet afternoon. Imagine the rich aroma of sweet milk slowly simmering on your stovetop, filling every corner of your home with a cozy, vanilla like fragrance that makes everyone feel instantly welcome and happy. You should make this when you want to surprise your family with a batch of ultra creamy homemade fudge, a luscious key lime pie, or a traditional tres leches cake that melts in their mouths. There is a beautiful emotional connection to making your own ingredients from scratch, as it shows your family and friends that you put your time, care, and genuine effort into the food you share with them. It is also the ultimate flavor upgrade for your morning cup of coffee, turning a simple daily caffeine routine into a luxurious coffeehouse experience right in your own living room. Whenever you feel like slowing down, practicing mindfulness, and enjoying the meditative process of cooking, this recipe is your perfect companion.
While sweetened condensed milk is undoubtedly a rich and indulgent treat, making it at home actually offers wonderful benefits for your fitness and health journey. When you buy canned milk from the grocery store, you have absolutely no control over the quality of the dairy, the amount of processed sugar, or the additives used to extend shelf life. By making this recipe yourself, you can easily swap traditional white sugar for healthier options like raw cane sugar, maple syrup, honey, or even low calorie sweeteners like erythritol and allulose if you are watching your sugar intake. You can also choose high quality organic milk, grass fed milk, or even low fat milk if you want to reduce the overall calorie count of your favorite sweet treats. For those with dairy sensitivities or vegan lifestyles, this recipe is a lifeaver because you can easily use full fat coconut milk or oat milk as your liquid base. Knowing exactly what goes into your body allows you to enjoy your sweet cravings with peace of mind, proving that you do not have to sacrifice your health goals to enjoy life’s sweet moments.
Ingredients You Will Need
To make this delicious homemade sweetened condensed milk, you only need two basic ingredients. However, you can add a couple of optional items to make the flavor even more luxurious. Here is the complete list of what you will need to gather before you start:
-
Whole Milk: Two cups (which is about four hundred and eighty milliliters). It is best to use full fat whole milk because the fat content helps to create a super creamy and thick texture.
-
White Granulated Sugar: Two thirds of a cup (which is about one hundred and thirty grams). Sugar is highly important because it sweetens the milk and acts as a natural preservative while helping the milk to thicken as it cooks.
-
Unsalted Butter (Optional): One tablespoon (about fifteen grams). Adding butter at the very end of the cooking process gives the condensed milk a gorgeous glossy shine and an extra rich mouthfeel.
-
Pure Vanilla Extract (Optional): One teaspoon (about five milliliters). A splash of high quality vanilla extract adds a lovely warm depth of flavor that pairs beautifully with the sweet milk.
Step by Step Method
Making sweetened condensed milk at home is a very simple process, but it does require some patience and attention. Follow these easy steps to get perfect results every single time.
Step One: Choose Your Pot
You will want to use a medium sized saucepan with a heavy bottom. A heavy bottomed pot is very important because it distributes heat evenly and prevents the milk and sugar from burning or sticking to the bottom of the pan. If your pot is too thin, the sugar might caramelize too quickly and ruin the texture.
Step Two: Combine the Milk and Sugar
Pour your two cups of whole milk into the saucepan and add the two thirds of a cup of white granulated sugar. Use a silicone spatula or a wooden spoon to stir the mixture gently before you turn on the heat. You want to make sure the sugar starts to combine with the milk so it does not settle in a thick layer at the bottom of the pot.
Step Three: Warm the Mixture
Place your saucepan over medium heat. Stir the mixture constantly as the milk warms up. Your main goal in this step is to make sure that the sugar dissolves completely into the milk before the milk starts to simmer. This should take about three to five minutes. You can test if the sugar is dissolved by rubbing a small drop of the warm milk between your fingers. If it feels completely smooth and not gritty, the sugar has dissolved.
Step Four: Bring to a Gentle Simmer
Once the sugar is fully dissolved, bring the mixture to a very gentle simmer. You should see tiny bubbles forming around the edges of the pot and occasionally rising to the surface. Once you reach this gentle simmer, immediately turn the heat down to low. You do not want the milk to boil vigorously. A hard boil will curdle the milk or cause it to bubble over the sides of your pot, which creates a huge mess on your stove.
Step Five: Let it Simmer and Evaporate
Allow the mixture to simmer on low heat for about thirty five to forty five minutes. During this time, the water in the milk will slowly evaporate, which concentrates the milk solids and sugars.
Important Rule for Stirring: Unlike custard or pudding, you do not need to stir this constantly. In fact, stirring too much can cause the sugar to crystallize, which makes the final product gritty. Instead, just give it a very gentle stir every five to ten minutes. Make sure to scrape down the sides of the pot gently to incorporate any milk that climbs up the walls.
Step Six: Skim the Foam
As the milk simmers, you might notice a thin layer of foam or skin forming on the surface of the liquid. This is completely normal. Use a spoon to gently skim this foam off the top and discard it. Removing the foam ensures that your finished sweetened condensed milk is perfectly smooth and free of lumps.
Step Five: Check the Volume and Thickness
Your sweetened condensed milk is ready when it has reduced by about half of its original volume. It should have a beautiful pale cream or light golden color, and it should be noticeably thicker than when you started. It will look similar to a thin syrup or heavy cream while it is still hot on the stove. Do not worry if it does not look as thick as the canned version yet, because the mixture will thicken up significantly as it cools down.
Step Six: Add Your Flavor Enhancers
Remove the saucepan from the heat source. If you are using the optional ingredients, now is the perfect time to add them. Stir in the one tablespoon of unsalted butter and the one teaspoon of pure vanilla extract. Stir gently until the butter is completely melted and fully incorporated into the warm sweet milk.
Step Seven: Cool and Strain
Let the condensed milk cool in the pot for about ten minutes. If you notice any tiny lumps or bits of cooked milk in your mixture, you can pour it through a fine mesh strainer into a clean glass jar. Straining is a fantastic trick to guarantee a professional, silky smooth texture. Allow the milk to cool completely to room temperature on your counter.
Step Eight: Store Your Creation
Once the sweetened condensed milk is completely cool, seal the glass jar with a tight lid. Store it in your refrigerator. It will continue to thicken into a rich, spoonable consistency as it chills.
Why This Recipe Is Special
This homemade sweetened condensed milk recipe is truly a cut above anything you can buy in a grocery store. Here are the main reasons why this recipe is so incredibly special and worth making:
-
Incredible Freshness and Clean Taste: Store bought condensed milk has often been sitting in a metal can for months or even years. This long storage time can give the milk a slightly metallic, stale taste. When you make it fresh at home, you get a clean, pure dairy flavor with a naturally rich sweetness that tastes like high quality caramel.
-
Absolutely No Preservatives: Commercial brands often add artificial stabilizers, preservatives, and chemical additives to keep their product shelf stable. This homemade recipe uses only fresh milk and pure sugar. The sugar itself acts as a natural preservative, meaning you get a clean label with zero hidden chemicals.
-
Complete Control Over Ingredients: You get to be the boss of your own food. If you prefer to use organic grass fed milk, you can. If you want to use raw sugar, brown sugar, or dairy free alternatives, you have the absolute freedom to make those choices.
-
Perfect for Budget Baking: Making condensed milk at home is often much cheaper than buying individual cans at the store, especially if you already have milk and sugar sitting in your kitchen. It is an amazing way to save money while still enjoying premium quality ingredients.
-
The Therapeutic Cooking Experience: There is a wonderful, peaceful joy in slow cooking. Making this recipe allows you to connect with the cooking process, enjoy the heavenly sweet aromas filling your home, and take a well deserved break from the busy pace of modern life.
Extra Tips for Better Taste
If you want to take your homemade sweetened condensed milk to the absolute next level of deliciousness, here are some creative ideas and expert tips to try:
-
Add a Pinch of Salt: Adding just a tiny pinch of fine sea salt or kosher salt at the very end of cooking will help to balance the intense sweetness and bring out the rich, buttery undertones of the milk.
-
Create a Warm Spiced Version: For a beautiful autumn or winter twist, you can add a whole cinnamon stick, a star anise, or a few cardamom pods to the milk while it is simmering. Just remember to fish them out before you cool and store the milk.
-
Try Brown Sugar for a Caramel Vibe: If you replace the white granulated sugar with light or dark brown sugar, you will end up with a rich, caramel like sauce that is incredibly deep in flavor and perfect for pouring over ice cream.
-
The Blender Trick for Ultimate Smoothness: If your condensed milk ever turns out slightly grainy due to sugar crystallization, do not throw it away. Simply pour it into a high speed blender and blend on high for thirty seconds. This will break up the sugar crystals and make it perfectly smooth again.
-
Use Full Fat Coconut Milk for a Vegan Twist: If you are dairy free, you can follow this exact same recipe using a can of full fat coconut milk instead of dairy milk. The result is a thick, tropical, and sweet coconut condensed milk that is absolutely divine in iced coffee.
Final Thoughts
Making your own homemade sweetened condensed milk is an incredibly rewarding experience that will forever change the way you look at this simple baking ingredient. It proves that you do not need fancy equipment or hard to find ingredients to create something truly magical and delicious in your own kitchen. This simple recipe brings a wonderful touch of warmth, love, and high quality taste to your desserts, coffees, and sweet snacks. Once you taste the fresh, caramel notes of this homemade version, you will never want to go back to buying the canned stuff again. So grab a pot, pour in your milk and sugar, and enjoy the beautiful process of making something wonderful from scratch.
Nutrition Details
Here is the nutritional breakdown for this homemade sweetened condensed milk recipe. Please keep in mind that these values are estimates based on using standard whole milk and white granulated sugar.
Nutrition Table (Per Serving and Total Recipe)
| Nutrient | Amount Per Serving (One Tablespoon) | Total Recipe (About Sixteen Servings) |
| Calories | Sixty five calories | One thousand and forty calories |
| Total Fat | One point five grams | Twenty four grams |
| Saturated Fat | One gram | Sixteen grams |
| Cholesterol | Five milligrams | Eighty milligrams |
| Sodium | fifteen milligrams | Two hundred and forty milligrams |
| Total Carbohydrates | Twelve grams | One hundred and ninety two grams |
| Sugars | Twelve grams | One hundred and ninety two grams |
| Protein | One gram | Sixteen grams |
Disclaimer
The nutritional information provided in this article is for educational and informational purposes only and should not be taken as professional medical advice. Everyone has a unique body, and individual nutritional needs and health results can vary significantly based on factors like metabolism, activity level, and overall health status. If you have specific dietary concerns, food allergies, diabetes, or other health conditions, it is always a wonderful idea to consult with a registered dietitian or a certified medical professional to ensure this recipe fits safely into your personal lifestyle.