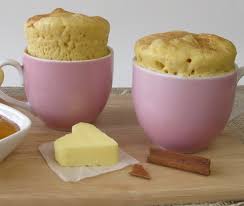
Baking fresh bread at home is one of the most beautiful experiences you can have in your kitchen because it fills your entire house with an aroma that feels like a warm hug. This specific recipe for garlic butter dinner rolls is all about creating the softest and fluffiest pieces of bread that you have ever tasted in your entire life. We are talking about pillowy clouds of dough that rise perfectly in the oven and get topped with a rich glaze made from real butter and fresh garlic. When you pull these rolls apart you will see the beautiful texture inside which is incredibly light and tender to the touch. This recipe is designed to help anyone become a master baker even if you have never touched yeast before because the steps are simple and highly rewarding. You do not need any fancy tools or rare ingredients to make this magic happen right in your own home oven today. By the time you finish reading this guide you will know exactly how to turn basic pantry staples into a masterpiece that everyone will talk about for weeks. The magic lies in the simple combination of flour and water and yeast working together to create something truly spectacular for your dinner table. You will love watching the dough grow and change shape as it transforms into golden spheres of pure joy.
There is a very good reason why people all over the world absolutely love garlic butter dinner rolls above almost any other side dish. Bread is a universal language of comfort and when you add the rich savory depth of garlic mixed with creamy butter it becomes completely irresistible to children and adults alike. Most people have fond memories of sitting at a restaurant table and waiting impatiently for that basket of warm rolls to arrive before the main meal. This recipe allows you to recreate that exact feeling of luxury and happiness without having to leave your house or spend a lot of money. The contrast between the golden outer crust and the super soft interior creates a wonderful texture experience that makes you want to reach for just one more piece. It is the kind of food that brings people together because nobody can resist the smell of garlic baking in the oven. Your family members will likely wander into the kitchen guided by their noses long before the timer even goes off. It is a crowd pleasing food that works for picky eaters and food lovers equally because the flavors are classic and deeply satisfying.
When it comes to deciding when to make these delicious rolls the truth is that they are perfect for almost any occasion you can think of throughout the year. You can bake them for big holiday feasts like Thanksgiving or Christmas when you want to impress your relatives with something made completely from scratch. They are also ideal for a cozy Sunday night dinner with your immediate family when you want to make the evening feel a little more special and connected. Baking bread is also a wonderful form of emotional therapy because kneading the dough allows you to slow down and relax after a very stressful week at work. The pure joy of holding a warm roll in your hands and watching the butter melt into the crevices is an emotional experience that lifts your mood instantly. It creates a sense of home and safety that modern fast food simply cannot replicate no matter how hard it tries. Every single bite delivers a burst of savory goodness that satisfies your deepest cravings for comfort food and warmth.
From a fitness and health perspective making your own bread at home gives you total control over what goes into your body which is highly beneficial. Store bought rolls are often packed with strange preservatives and artificial ingredients that you cannot even pronounce just to make them last longer on shelves. When you bake these rolls yourself you are using pure ingredients like fresh milk and real butter and wholesome flour without any hidden chemicals. This means you can enjoy your favorite comfort food as a wonderful reward within a balanced lifestyle without feeling guilty about what you are eating. Fueling your body with real food made by your own hands is an important part of wellness because it honors your health and your taste buds at the same time. You can easily pair these rolls with a light vegetable soup or a fresh green salad to create a balanced meal that satisfies your hunger and keeps your energy high. It proves that you do not have to give up bread to live a healthy life as long as you choose high quality homemade options.
Ingredients You Will Need
To make these wonderful garlic butter dinner rolls you will need a few basic ingredients that you might already have in your kitchen right now. Please make sure that your ingredients are fresh especially the yeast because fresh yeast is the secret to getting that perfect rise. Here is everything you need to gather before you start baking.
-
All purpose flour: 4 cups total measured correctly
-
Active dry yeast: 2 and a quarter teaspoons which is equal to one standard packet
-
Warm whole milk: 1 cup heated to about 105 degrees Fahrenheit
-
Warm water: one fourth of a cup at the same warm temperature
-
Granulated white sugar: 3 tablespoons to feed the yeast and add flavor
-
Unsalted butter for the dough: 4 tablespoons softened at room temperature
-
Unsalted butter for the garlic topping: 4 tablespoons melted
-
Fine sea salt: 1 and a half teaspoons
-
Large eggs: 2 pieces kept at room temperature
-
Fresh garlic cloves: 4 pieces very finely minced
-
Fresh parsley leaves: 2 tablespoons very finely chopped
-
Garlic powder: half a teaspoon for extra depth in the dough
-
Cooking spray or extra oil: 1 tablespoon to grease your mixing bowl
Step by Step Method
Step 1: Activating the Yeast
The very first thing you need to do is wake up your yeast so that it can make your bread rise beautifully. Take a small bowl and pour in your warm water along with one tablespoon of the granulated white sugar. Stir it gently with a spoon and then sprinkle the active dry yeast over the top of the liquid. Let this mixture sit completely undisturbed for about ten minutes. During this time the yeast will start to eat the sugar and you will see it become very foamy and bubbly on top. If your mixture does not bubble up after ten minutes it means your yeast might be dead or your water was too hot or too cold. If that happens you must discard it and start over with fresh yeast to ensure your bread rises correctly.
Step 2: Preparing the Liquid Base
While your yeast is waking up you can prepare the other wet ingredients in a larger bowl. Pour your warm whole milk into the bowl and add the remaining two tablespoons of granulated white sugar along with the fine sea salt. Add your softened unsalted butter which should be soft enough to smash easily with a spoon. Crack your two large room temperature eggs into the bowl as well. Use a whisk to mix all of these ingredients together until the eggs are broken up and everything is combined. Do not worry if the butter looks a little chunky at this point because it will blend into the flour perfectly later on.
Step 3: Combining the Ingredients
Now it is time to bring everything together into a beautiful dough. Pour your foamy yeast mixture into the large bowl with your milk and egg mixture. Stir them together for a few seconds. Next add the garlic powder to the bowl to give the dough an incredible background flavor. Start adding your all purpose flour one cup at a time while stirring with a sturdy wooden spoon or a silicone spatula. As you add the third cup of flour you will notice that a sticky dough begins to form and separate from the sides of the bowl. Add the final cup of flour slowly because you might not need every single tablespoon of it if your kitchen environment is humid.
Step 4: Kneading the Dough
Once your ingredients form a cohesive ball transfer the dough onto a clean flat surface like your kitchen counter. Dust a tiny bit of flour on your hands and on the counter so the dough does not stick. Use the palms of your hands to push the dough forward firmly and then fold it back over itself. Rotate the dough slightly and repeat this pushing and folding motion. This process is called kneading and it is what develops the gluten structure that gives the rolls their chewy texture. Keep kneading the dough for about eight to ten minutes until it becomes completely smooth and stretchy. You can test it by pressing a finger gently into the dough; if it springs back quickly it is ready.
Step 5: The First Rise
Take a clean large bowl and grease the inside surfaces thoroughly with your cooking spray or a little bit of vegetable oil. Place your beautiful smooth dough ball inside the bowl and turn it over once so that the top of the dough is also coated in a thin layer of oil. Cover the bowl tightly with plastic wrap or a clean damp kitchen towel to keep the moisture inside. Place the bowl in a warm and draft free spot in your home like an unlit oven or near a sunny window. Let the dough rest and rise for about one hour or until it has completely doubled in its physical size.
Step 6: Shaping the Dinner Rolls
After the dough has doubled in size gently press your fist into the center of the dough to release the trapped air bubbles. Turn the dough out onto your clean counter space. Use a sharp knife or a dough scraper to divide the large piece of dough into twelve equal pieces. To shape each piece into a perfect ball take one portion of dough and tuck the edges underneath itself to create a smooth top surface. Roll the ball gently between your palm and the counter in a circular motion to make it nice and round. Place each shaped ball into a greased nine by thirteen inch baking pan leaving a little space between them.
Step 7: The Second Rise
Once all twelve rolls are placed neatly inside your baking pan you need to let them rise a second time. Cover the pan loosely with your damp kitchen towel or plastic wrap so the dough does not dry out on top. Place the pan back into your warm spot for about thirty to forty-five minutes. During this second rise the rolls will expand and grow into each other until they fill up the entire pan beautifully. They should look very puffy and soft before they go into the oven.
Step 8: Baking to Golden Perfection
While your rolls are finishing their second rise preheat your kitchen oven to 375 degrees Fahrenheit. Once the oven is hot and the rolls are puffy remove the towel or plastic wrap from the pan. Place the pan on the middle rack of your preheated oven. Bake the rolls for about eighteen to twenty-two minutes. Watch them closely through the oven window; you want the tops to turn a gorgeous deep golden brown color. You can also test them by tapping the top of a roll gently; it should sound slightly hollow.
Step 9: Preparing the Garlic Butter Glaze
While your rolls are baking in the oven you can quickly prepare the magical garlic butter topping. Melt your four tablespoons of unsalted butter in a small saucepan over low heat or in a microwave safe bowl. Once the butter is melted stir in your finely minced fresh garlic cloves and your finely chopped fresh parsley. The heat from the melted butter will warm up the garlic and release its wonderful oils without burning it. Keep this mixture warm until the rolls come out of the oven.
Step 10: Glazing and Serving
As soon as you pull the hot baking pan out of your oven grab a pastry brush. Dip the brush generously into your garlic butter mixture and coat the tops of the hot rolls immediately. The warm bread will absorb the rich butter and savory garlic flavors like a sponge. Make sure to get plenty of the minced garlic and green parsley on top of every single roll. Let the rolls cool inside the pan for about ten minutes before serving them warm to your eager guests.
Why This Recipe Is Special
This garlic butter dinner rolls recipe is special because it strikes a perfect balance between ultimate comfort food and high quality home cooking. When you taste these rolls you will notice that the flavor is much cleaner and more vibrant than anything you can buy at a local supermarket. The inclusion of garlic powder inside the actual dough means that the savory garlic flavor is baked into every single layer of the bread rather than just sitting on top. This creates an incredible depth of taste that pairs beautifully with the rich sweetness of the whole milk and butter.
From a health standpoint this recipe shines because it completely eliminates the artificial additives and hydrogenated oils commonly found in factory baked breads. You are fueling your body with simple carbohydrates that provide clean energy along with essential nutrients from the eggs and dairy. Garlic itself is known for its excellent antioxidant properties and immune support benefits which adds a nice healthy touch to your meal. Making your own food also promotes a mindful relationship with eating because you appreciate the effort and love that went into creating the meal. It is a wonderful option for families who want to eat better without sacrificing the foods that bring them joy.
Extra Tips for Better Taste
To take these dinner rolls to an even higher level of deliciousness you can experiment with a few creative adjustments. One great idea is to sprinkle a handful of freshly grated parmesan cheese over the tops of the rolls during the last five minutes of baking. This creates a crispy cheesy crust that combines beautifully with the garlic butter glaze. You can also mix other fresh herbs into your butter topping such as chopped rosemary or thyme which gives the rolls a sophisticated herbal note.
Another excellent tip for achieving the absolute softest rolls possible is to use bread flour instead of all purpose flour if you have it available. Bread flour has a higher protein content which helps create a stronger gluten network and leads to a more pillowy texture. If you want a sweeter flavor profile you can replace the granulated white sugar with local honey in both the yeast mixture and the dough base. Always make sure to use a kitchen thermometer to check your liquid temperatures because keeping liquids under 110 degrees Fahrenheit prevents your yeast from getting damaged.
Final Thoughts
Baking these garlic butter dinner rolls is a rewarding journey that turns simple ingredients into an extraordinary culinary treat. There is nothing quite like the feeling of pulling a tray of golden brown rolls out of your own oven and sharing them with the people you care about most. This recipe is foolproof for beginners and sophisticated enough for experienced cooks to enjoy. We hope you find joy in the process of kneading and shaping this dough and that these rolls bring warmth to your dinner table for many years to come.
Nutrition Details
The following table provides an approximate nutritional breakdown for one single garlic butter dinner roll based on the recipe being divided into twelve equal servings.
Disclaimer
Please keep in mind that everyone has a unique body and unique nutritional needs so individual health results and dietary reactions may change. The nutritional values provided above are estimations calculated using standard ingredient databases and might vary depending on the specific brands you use. If you have specific medical conditions or strict dietary restrictions please consult with a qualified healthcare professional or a registered dietitian before making significant changes to your regular eating habits.