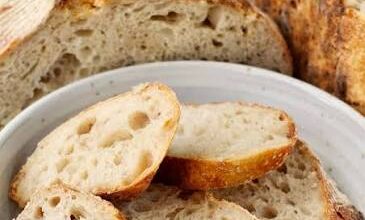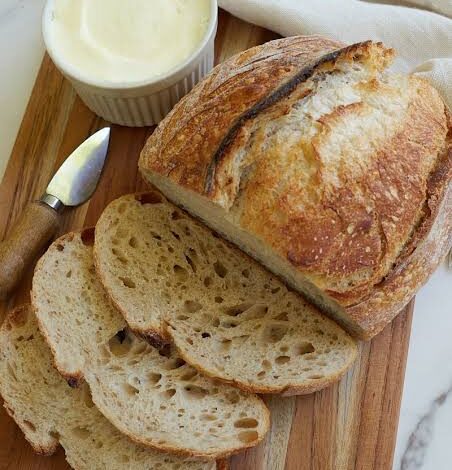
Making a fresh loaf of white sourdough bread at home is one of the most rewarding kitchen projects you can ever try. There is something truly magical about taking basic kitchen items like flour, water, and salt, and turning them into a crispy, golden brown masterpiece with an amazingly soft center. This foolproof white sourdough bread recipe is carefully crafted to take away all the guess work and fear that often comes with classic bread baking. Many beginners feel nervous when they hear about starter cultures, long fermentations, or special shaping techniques, but this guide breaks everything down into gentle, easy steps that anyone can follow with success. By using simple ingredients and clear timing, you will learn how natural wild yeast works its magic to lift your dough without relying on store bought instant yeast packets. The final result is a loaf that features an ultra crunchy outer crust, a light and tender crumb structure, and that iconic gentle tangy flavor that makes fresh sourdough famous around the entire world.
People absolutely love this specific white sourdough recipe because it yields consistent and reliable results every single time you heat up your kitchen oven. Unlike commercial bakery loaves that are often filled with artificial softeners, excess preservatives, and unnecessary additives, this home baked version relies entirely on traditional fermentation methods that build pure, unbelievable flavor. Home bakers adore the incredible contrast in textures, specifically the crisp crunch of the deeply baked crust paired with the pillowy, chewable center that melts in your mouth. Another big reason for its popularity is the creative freedom it offers, as you can easily customize the baking timeline to fit around your work schedule, family obligations, or relaxing weekend routines. Friends, family members, and house guests will constantly praise the professional appearance and divine aroma of your loaves, often assuming you bought them from an expensive artisan bakery. Mastering this simple process gives you immense personal pride and provides your household with wholesome, delicious bread whenever you crave it.
You can bake this delightful sourdough bread whenever you want to bring warmth, comfort, and amazing smells into your living space. Baking fresh bread is a wonderful emotional experience, serving as a soothing weekend hobby that helps you slow down, reduce daily stress, and connect with simple artisanal traditions. The incredible mouth watering taste makes it the absolute ultimate staple for daily breakfasts, gourmet sandwiches, hearty soups, or luxurious garlic bread treats. From a health and fitness viewpoint, long fermented sourdough is much easier on your digestive system compared to quick rise commercial white bread, making it a smarter choice for daily consumption. The slow fermentation process breaks down complex starches and gluten structures naturally, which allows your body to absorb nutrients far more effectively while avoiding uncomfortable stomach bloating. Whether you want to nourish your loved ones with clean food, impress guests during dinner parties, or simply enjoy a quiet therapeutic baking session on a rainy Sunday afternoon, this reliable recipe fits every occasion perfectly.
Taking the leap into sourdough baking also connects you to thousands of years of human culinary history in a deeply satisfying way. In our modern world full of quick fixes and instant processed food, spending time nurturing a live dough teaches patience, mindfulness, and real kitchen confidence. The process of watching a plain mixture of flour and water rise into a giant, airy ball of dough instills a profound sense of accomplishment that standard grocery store shopping can never match. Every single loaf you bake will have its own unique personality, subtle flavor notes, and beautifully rustic visual pattern score. Sharing a warm slice slathered in rich butter with your family creates unforgettable warm memories around your dining table. Once you experience the joy of cutting into a loaf that you built completely from scratch, you will likely never want to go back to buying plain manufactured bread again.
Ingredients You Will Need
To bake this foolproof white sourdough bread, you will need the following basic kitchen ingredients. Make sure your measurements are accurate for the best possible dough texture.
-
Active white sourdough starter (bubbly and well fed): 100 grams
-
Unbleached bread flour (or high protein white flour): 500 grams
-
Warm filtered water (around 80 degrees Fahrenheit): 350 grams
-
Fine sea salt (or pure salt without added iodine): 10 grams
Step by Step Method
Step 1: Feeding Your Sourdough Starter
Before you start mixing your main dough, ensure your sourdough starter is active, healthy, and very bubbly. Feed your starter equal parts flour and warm water about four to six hours before you plan to begin mixing. Set it in a warm location until it doubles in size and shows plenty of tiny air bubbles on the top and sides. You can drop a tiny spoonful of the active starter into a glass of warm water. If it floats safely on the surface, your starter is ready to bake great bread.
Step 2: Mixing the Water and Starter
In a large clean mixing bowl, pour in 350 grams of warm filtered water. Add 100 grams of your active bubbly sourdough starter directly into the water. Use a thick wooden spoon or your fingers to gently stir the starter into the water until it completely dissolves and turns into a cloudy milky liquid. This smooth distribution ensures your wild yeast spreads evenly throughout all the flour later on.
Step 3: Combining the Flour
Pour 500 grams of unbleached bread flour into your bowl containing the cloudy water and starter mixture. Using a strong sturdy spoon or a dough whisk, mix everything together thoroughly until all the dry flour bits disappear. The mixture will look quite shaggy, rough, and sticky at this stage, which is completely normal. Cover the bowl securely with a damp tea towel or a sheet of plastic wrap and let it rest undisturbed for 30 to 45 minutes. This important resting period is called the autolyse phase, which allows the flour to fully absorb the water and begin developing natural gluten strands automatically.
Step 4: Adding the Sea Salt
After the resting period ends, sprinkle 10 grams of fine sea salt evenly over the top of your wet dough dough mass. Dimple the salt into the dough using wet fingers, then gently pinch, fold, and squeeze the dough repeatedly for about two minutes until the salt grains are fully incorporated. You will quickly notice the dough starting to feel slightly tighter, smoother, and more elastic in your hands.
Step 5: Stretch and Fold Technique
Instead of traditional tiring kneading on a floured counter, sourdough uses gentle stretches and folds to build strength. Keep your hands slightly damp so the dough does not stick to your skin. Grab one edge of the dough in your bowl, gently pull it upward without ripping it, and stretch it over the top towards the center. Rotate your bowl a quarter turn and repeat this lifting and folding motion. Do this four times until you complete a full circle around the bowl. Cover the bowl again and let it rest for 30 minutes. Repeat this four step stretch and fold process every 30 minutes for a total of four rounds over two hours. Notice how the dough becomes remarkably smooth, strong, and silky after each round.
Step 6: Bulk Fermentation
Once your four stretch and fold sessions are completely finished, cover the bowl tightly and leave the dough alone on your warm kitchen counter for bulk fermentation. This primary rising step usually takes anywhere from three to six hours depending on the exact room temperature of your house. Your dough is fully fermented when it rises by roughly 50 to 75 percent in volume, displays a gently domed top surface with visible surface bubbles, and wobbles like jello when you gently shake the bowl.
Step 7: Pre Shaping the Dough
Lightly dust your clean kitchen countertop with a pinch of flour and gently tip the puffy fermented dough out of the bowl. Be very careful not to deflate all the valuable trapped air bubbles inside. Using lightly floured hands or a bench scraper, gently shape the dough into a soft round ball by tucking the edges underneath itself. Let this round dough ball sit uncovered on your counter for 20 to 30 minutes to relax the internal gluten strands.
Step 8: Final Shaping
Lightly dust the top of your relaxed dough ball with a little more bread flour. Flip the dough over so the smooth sticky side rests flat against the counter. Gently stretch the dough into an even rectangle shape. Fold the left side towards the middle, then fold the right side over it like a business letter. Roll the dough up firmly from the bottom to top to create a tight, seamless cylinder or round shape with great surface tension.
Step 9: Cold Proofing in the Fridge
Place your shaped dough upside down into a dedicated bread proofing basket or a standard medium mixing bowl lined with a clean cotton kitchen towel heavily dusted with rice flour or white cornstarch. Cover the basket loosely with a lightweight plastic bag. Place the basket into your refrigerator for a cold proofing rest lasting between 8 to 16 hours. Cold proofing slows down the rising process while building complex sour flavors and making the dough firm enough to score easily before baking.
Step 10: Preheating Your Oven
The next morning, place a heavy iron Dutch oven with its lid on onto the middle rack of your home oven. Turn your oven heat up high to 450 degrees Fahrenheit (230 degrees Celsius) and let it preheat thoroughly for a full 45 to 60 minutes so the heavy iron vessel becomes super hot.
Step 11: Scoring the Dough
Carefully remove your cold shaped dough directly from the refrigerator. Place a sheet of parchment paper over the top of the basket, place a flat cutting board over that, and flip everything upside down so the dough rests gracefully on the parchment paper. Lift the basket away gently. Dust off any excess flour on the top. Using a sharp razor blade or a specialized baker blade, make one long, confident, smooth slash about half an inch deep across the top of the dough ball. This deep slash allows steam to escape controlled during baking, creating a magnificent tall rise and a cute crisp ear crust.
Step 12: Baking Your Sourdough Loaf
Carefully pull the scorching hot Dutch oven out of your preheated oven using thick protective oven mitts. Use the parchment paper edges as handles to gently lower your scored dough ball into the hot pot. Drop two tiny ice cubes underneath the parchment paper inside the pot to generate extra moisture steam. Immediately cover the pot with its heavy iron lid and place it back into your hot oven. Bake with the lid on for 20 minutes to trap steam, which helps the crust stay soft enough for maximum expansion.
Step 13: Uncovering and Finishing the Bake
After 20 minutes pass, carefully remove the lid from your Dutch oven. You will see a tall pale loaf that has expanded dramatically inside the vessel. Lower the oven temperature slightly to 410 degrees Fahrenheit (210 degrees Celsius) and continue baking uncovered for another 20 to 25 minutes. During this final stage, the crust transforms into a beautiful deep golden mahogany color with incredible crunchy blisters.
Step 14: Cooling Completely
Carefully lift your golden sourdough loaf out of the hot Dutch oven and place it onto a wire cooling rack. Allow the freshly baked bread to cool completely at room temperature for at least two full hours before slicing into it with a serrated bread knife. Resisting the urge to cut warm bread is crucial because cutting too early traps steam inside, making the crumb wet, gummy, and dense. Enjoy your crisp homemade sourdough slice with creamy fresh butter.
Why This Recipe Is Special
This white sourdough recipe stands out because it combines incredible convenience with exceptional artisan flavor. Unlike store bought options, it relies entirely on natural ingredients, avoiding commercial yeasts, preservatives, and artificial additives.
Digestion Friendly
The long slow fermentation process breaks down complex gluten proteins and phytic acid naturally. This process makes the bread much easier on human digestion, reducing bloating and allowing your body to absorb minerals like zinc, magnesium, and iron far better.
Incredible Flavor Profile
Wild yeast and beneficial lactobacillus bacteria create deep, tangy, and complex flavor notes that synthetic factory yeasts simply cannot recreate. Every single bite delivers a wonderful blend of subtle acidity and rich golden wheat notes.
Perfect Texture Contrast
Using high protein bread flour combined with a steaming Dutch oven produces a outer crust that crackles loudly when sliced, alongside an amazingly soft, airy, and bouncy interior texture.
Extra Tips for Better Taste
-
Use whole wheat or rye flour for feeding your starter to give your loaf an extra layer of nutty sourdough flavor.
-
Substitute 50 grams of plain water with warm unpasteurized beer or hard cider during step two for a unique malt taste.
-
Sprinkle toasted sesame seeds, poppy seeds, or coarse sea salt over the top of the wet dough just before scoring.
-
Mix in roasted garlic cloves, shredded cheddar cheese, and fresh chopped rosemary during the final stretch and fold step for a savory twist.
-
Spray the top surface of your raw dough lightly with water right before closing the Dutch oven lid to make the final crust extra blistered and crispy.
Final Thoughts
Baking your own foolproof white sourdough bread is a wonderfully fulfilling journey that brings genuine happiness, incredible aromas, and delicious wholesome food right into your home kitchen. While the entire timeline might seem long at first glance, the actual active hands on working time is remarkably short and easy to manage. With just a tiny bit of practice, patience, and love, you will easily master the art of natural sourdough fermentation and feed your family healthy bread you can feel proud of. Grab your flour, feed your starter today, and enjoy the magical experience of making artisan bread completely from scratch.
Nutrition Details
Here is the approximate nutrition information for this white sourdough bread recipe. The exact values may shift slightly depending on your specific flour brands and exact slice sizes.
Recipe Totals and Per Serving Breakdown
| Nutritional Component | Full Loaf Total (100 Percent) | Per Serving (1 Slice / 10 Slices Total) |
| Total Calories | 1850 kcal | 185 kcal |
| Carbohydrates | 380 g | 38 g |
| Dietary Fiber | 15 g | 1.5 g |
| Sugars | 2 g | 0.2 g |
| Protein | 60 g | 6 g |
| Total Fat | 5 g | 0.5 g |
| Saturated Fat | 1 g | 0.1 g |
| Sodium | 3900 mg | 390 mg |
| Potassium | 550 mg | 55 mg |
| Iron | 22 mg | 2.2 mg |
Disclaimer
Everyone’s body, health needs, and digestive systems are completely unique, so individual experiences with sourdough bread may vary. While long fermentation generally lowers gluten levels and improves overall digestability compared to fast yeast bread, this recipe still contains real wheat flour and natural gluten proteins. Therefore, this bread is not safe for individuals with celiac disease or severe wheat allergies. Nutritional estimations provided in this guide are general guidelines only and can fluctuate based on specific ingredients, fermentation lengths, and slice portions used in your own home kitchen. Always consult a qualified health professional or certified dietitian if you have specific dietary restrictions or digestive health concerns.