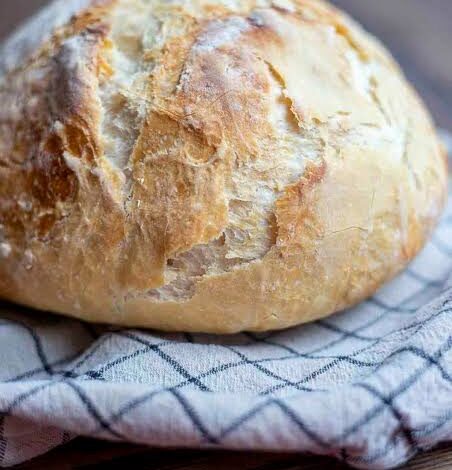
Welcome to the absolute easiest way to turn your leftover sourdough starter into a warm loaf of fresh homemade bread without any hard work or messy counters. If you have ever felt bad about throwing away your extra starter during feeding time, this recipe is here to save the day and your kitchen budget. Many people think that making artisan bread at home requires hours of intense physical labor, specialized baking tools, and advanced kitchen skills, but this method completely proves that idea wrong. Instead of standing over your counter folding and pushing dough until your arms hurt, you will let simple physics and time do all the heavy work for you overnight. This guide will walk you through every small detail so you can enjoy a golden crispy crust and soft chewy center whenever you want.
Bakers and home cooks all over the world fall completely in love with this recipe because it removes every bit of stress usually connected with traditional baking. You do not need to worry about correct hand technique, sticky fingers that take forever to wash, or complex schedule timings that keep you locked inside your house all day long. The discarded starter adds a deep tangy flavor that tastes like it came straight from a fancy European bakery, while a tiny sprinkle of instant yeast gives you a total guarantee that your loaf will rise big and fluffy every single time. It is a wonderfully forgiving process that works smoothly even if you forget about the dough for an extra hour or if your kitchen is a bit chilly. This sheer simplicity makes it the absolute best confidence builder for anyone who has always wanted to bake bread but felt too scared to try.
There are so many lovely reasons to bake this bread, whether you are looking for emotional comfort on a rainy afternoon or trying to eat cleaner food with fewer ingredients. Picture your entire home filling up with the rich comforting aroma of freshly baked sourdough on a Sunday morning as your family gathers around the table waiting for the first hot slice. Eating real sourdough discard bread is also much gentler on your digestive system because the natural fermentation process helps break down heavy gluten proteins and starches over time. It provides a wholesome source of long lasting energy for active fitness routines, and it completely beats store bought commercial bread that is often packed with artificial preservatives, excessive sugars, and mysterious chemical additives.
Making this recipe also creates a wonderful sense of personal accomplishment that brightens up your whole week and reduces food waste in your daily life. Taking basic pantry ingredients like simple flour, water, salt, and leftover starter and transforming them into a golden masterpiece gives you a deep feeling of traditional pride that modern convenient shopping simply cannot match. It gives you a fun creative project to share with young children or friends, teaching them how natural food transforms through patience and warmth. Once you slice into that crackling crust and taste the rich butter melting into the warm soft crumbs, you will realize that beautiful homemade food does not need to be complicated or time consuming at all.
Ingredients You Will Need
Here is the simple list of ingredients required to bake this delicious loaf. Please measure everything carefully using standard kitchen measuring tools or a digital kitchen scale for the best results.
- Unbleached all purpose flour or bread flour: 4 cups (500 grams)
- Active or unfed sourdough discard: 1/2 cup (120 grams)
- Warm water between 100 degrees and 105 degrees Fahrenheit: 1 and 1/2 cups (360 milliliters)
- Instant yeast or active dry yeast: 1/2 teaspoon (2 grams)
- Fine sea salt or kosher salt: 2 teaspoons (10 grams)
- Pure honey or maple syrup: 1 teaspoon (7 grams)
- Extra flour for shaping and dusting the dough: 3 tablespoons
Step by Step Method
Step 1: Mixing the Dough
Take a large clean glass or ceramic mixing bowl and pour in your warm water. Add the small amount of instant yeast and the spoonful of honey into the water, giving it a gentle stir with a wooden spoon until everything dissolves smoothly. Measure out your sourdough discard straight from the refrigerator and pour it directly into the liquid mixture, whisking lightly until the discard loosens up and blends into a milky liquid. Carefully add all four cups of flour along with the fine sea salt right on top of the liquid ingredients. Use a sturdy spatula or wooden spoon to stir everything together in wide circular motions until all the dry flour disappears completely. The dough will look very shaggy, wet, and sticky, which is exactly how it should look at this stage, so do not add extra flour even if you feel tempted to do so.
Step 2: The Long Overnight Rise
Cover your mixing bowl tightly with a sheet of plastic wrap or a clean damp kitchen towel to stop the surface of your dough from drying out. Place the covered bowl in a warm draft free spot in your kitchen, such as inside an turned off oven with the light bulb turned on or on top of your counter away from open windows. Allow the dough to sit peacefully completely untouched for 8 to 12 hours, or overnight. During these long quiet hours, the water hydrates the flour molecules naturally, gluten strands form all by themselves, and the sourdough discard imparts a wonderful rich flavor profile throughout the entire mass. By the next morning, your dough should double or triple in size, showing lots of big lazy bubbles on top and smelling pleasantly sour and fruity.
Step 3: Shaping the Loaf
Clear a large flat workspace on your kitchen counter and dust it generously with a couple of tablespoons of extra flour. Gently scrape your risen, bubbly dough out of the bowl onto the floured surface using a silicone spatula, being careful not to pop all the nice air bubbles inside. Flours your hands well and gently pull the outer edges of the dough toward the center, working your way around in a circle to form a smooth round ball shape. Flip the dough over so the smooth side faces upward, and lightly cup your hands around the base of the ball, pulling it toward you across the counter to build surface tension on the outer skin. Tear off a large piece of parchment paper, place it on your counter, and gently lift your shaped dough ball directly onto the center of the parchment paper.
Step 4: The Second Short Rise and Preheating
Cover your dough ball lightly with a clean dry cotton towel and let it rest on the parchment paper for about 30 to 45 minutes to relax and puff up slightly. While your dough is taking its final short rest, place a large 5 quart or 6 quart Dutch oven with its lid on onto the middle rack of your cold oven. Turn your oven on to 450 degrees Fahrenheit (232 degrees Celsius) and let it preheat thoroughly for at least 30 full minutes alongside the heavy pot inside. Heating your Dutch oven completely is the absolute secret step that creates intense trapped steam, which yields that insanely crispy baker style crust you are looking for.
Step 5: Scoring and Baking
Once the oven reaches full temperature, carefully pull out the hot oven rack and remove the piping hot lid from your Dutch oven using thick protective oven mitts. Use a sharp baker blade, a clean razor blade, or a very sharp kitchen knife to cut a shallow straight line or an X shape about half an inch deep across the top of your dough ball. This cut allows steam to escape safely without tearing the sides of your bread as it expands rapidly in the heat. Carefully grab the corners of the parchment paper holding your dough and lower both the paper and the dough together straight into the center of the blistering hot pot.
Step 6: The Two Stage Bake
Place the heavy lid securely back on top of the hot Dutch oven and carefully slide the oven rack back into the hot oven. Bake with the lid closed tight for 30 minutes, allowing the trapped moisture and steam to cook the interior dough while keeping the outer skin soft so it can expand fully. After 30 minutes pass, open the oven and carefully remove the lid to let the steam escape for the second part of the baking process. Bake uncovered for another 15 to 20 minutes until the crust turns a magnificent deep golden brown color and crackles when tapped.
Step 7: Cooling Down Properly
Using your heatproof mitts, lift the finished bread out of the hot Dutch oven by grabbing the corners of the parchment paper and transfer it to a wire cooling rack immediately. Resist the strong temptation to slice into your hot loaf right away, as slicing hot bread traps moisture inside into a gummy texture. Let the loaf cool completely down to room temperature for at least 1 full hour so the crumb structure sets properly and finishes its natural cooking cycle smoothly.
Why This Recipe Is Special
This unique sourdough discard bread holds a truly special place in the baking world because it combines traditional old world flavor with modern zero stress simplicity. Traditional sourdough requires constant attention, complicated stretch and fold routines every thirty minutes, and precise temperature monitoring for days on end. This recipe eliminates all that tedious labor by utilizing the power of a long overnight rest where natural enzymes break down the flour smoothly without physical effort from your hands. It saves you vast amounts of time and energy while still giving you the exact same rustic look and incredible taste of an artisanal bakery loaf.
From a health standpoint, this loaf is far superior to standard commercial breads that you buy at the grocery store. The long fermentation window gives the beneficial wild bacteria and natural yeasts plenty of time to break down heavy phytic acid, which is an antinutrient that usually blocks your body from absorbing essential minerals like magnesium, iron, and zinc. Because phytic acid is reduced, your digestive system can absorb those vital nutrients far more efficiently. Additionally, the gluten proteins are pre digested by the natural fermentation process, making this bread much easier on sensitive stomachs that usually experience bloating or discomfort after eating standard processed wheat products.
The flavor profile achieved through this hybrid approach is absolutely outstanding and deeply satisfying to taste buds of all kinds. The sourdough discard contributes a light, pleasant, tangy note that lingers on your tongue without being overly sour or harsh. Combined with the high heat baking method inside a sealed iron vessel, the crust transforms into a deeply caramelized shell filled with rich nutty notes. Inside, the crumb remains wonderfully moist, airy, and springy, offering a delightful texture contrast that makes every bite an absolute joy to eat plain, toasted, or slathered with salted creamery butter.
Extra Tips for Better Taste
- Add roasted garlic cloves and fresh chopped rosemary to the dough during the initial mixing phase for an incredible aromatic twist that smells amazing while baking.
- Mix in one cup of sharp shredded cheddar cheese and diced jalapeño peppers right before the overnight rise to create a spicy savory loaf that pairs perfectly with warm soups.
- Substitute a quarter cup of the white flour with dark rye flour or whole wheat flour to add a earthy, nutty depth of flavor and rich brown color.
- Use bread flour instead of regular all purpose flour if you prefer a much chewier texture and a taller final loaf structure.
- Sprinkle coarse sea salt flakes, sesame seeds, or everything bagel seasoning on top of the dough ball right after scoring for a crunchy flavorful top crust.
- Brush the top crust with warm melted garlic butter as soon as you lift the baked loaf out of the Dutch oven for a glossy finish and rich flavor.
- If you do not own a cast iron Dutch oven, you can bake this bread on a flat baking sheet with a deep baking dish filled with boiling water placed on the bottom oven rack to create artificial steam.
Final Thoughts
Baking your own delicious artisan bread at home does not have to be a scary, complicated, or exhausting chore reserved only for professional bakers. With this easy no knead sourdough discard recipe, you can effortlessly transform simple pantry staples into a gorgeous golden loaf that will impress your family and make your whole house feel extra cozy. You will save money, reduce food waste from your weekly sourdough feeding routine, and enjoy wholesome food made without complex preservatives or artificial ingredients. Take your time, enjoy the soothing process, and prepare yourself for the incredible joy of cutting into your very own freshly baked, crackling warm loaf of bread today.
Nutrition Details
Below you will find the estimated nutritional values calculated for the complete bread recipe as well as the average nutritional content per individual slice, assuming the loaf is cut into twelve equal slices.
Full Recipe and Per Serving Breakdown
| Total Calories | 2100 kcal | 175 kcal |
| Carbohydrates | 430 grams | 35.8 grams |
| Dietary Fiber | 16 grams | 1.3 grams |
| Total Sugars | 7 grams | 0.6 grams |
| Protein | 62 grams | 5.1 grams |
| Total Fat | 5 grams | 0.4 grams |
| Saturated Fat | 0.8 grams | 0.06 grams |
| Sodium | 3900 milligrams | 325 milligrams |
| Potassium | 650 milligrams | 54 milligrams |
| Calcium | 110 milligrams | 9.1 milligrams |
| Iron | 23 milligrams | 1.9 milligrams |
Disclaimer
The nutritional information and health benefits provided in this article are intended for general educational and informational purposes only and should not be taken as medical advice. Every person has a completely unique body, distinct metabolic rate, and individual health requirements, which means your personal digestion and overall physical results may vary from what is described here. If you have specific dietary restrictions, severe gluten sensitivities, celiac disease, or ongoing medical concerns, please consult with a qualified physician or registered dietitian before introducing new fermented foods into your standard daily meal plan.