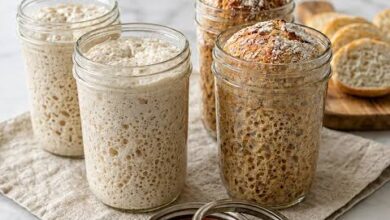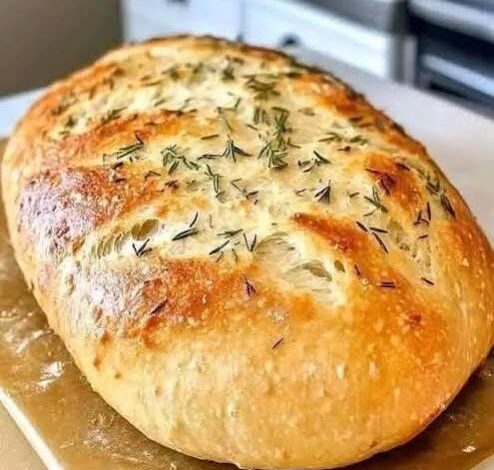
Making homemade bread can feel like a big challenge when you are just starting out in the kitchen, but this simple recipe changes everything completely. Today we are talking all about a wonderful loaf of homemade bread that requires absolutely no kneading at all, filled with fragrant fresh rosemary and rich roasted garlic flavors. Many people think that baking fresh bread at home takes hours of hard manual labor, high levels of expert skill, and special machinery like heavy stand mixers. However, this magical method removes all the hard work completely while still giving you a crusty golden loaf that looks and tastes like it came straight from an expensive traditional European bakery. You do not need any special baking tools or previous kitchen experience to get a fantastic result on your very first try. The secret behind this incredible process is simply giving the wet dough plenty of time to rest quietly on your kitchen counter, allowing nature to do all the heavy work for you naturally. As the simple mixture sits comfortably overnight, natural bubbles form inside the dough, creating a light chewy texture and rich homemade flavor automatically without you ever having to press, pull, or fold the dough with your hands.
People all over the world fall deeply in love with this particular bread recipe because it delivers maximum gourmet flavor with the lowest possible effort. The magic lies in the amazing combination of earthy green rosemary, cozy garlic goodness, and the deep aroma of fresh yeast baking in a hot oven. When this loaf is baking inside your kitchen, the incredible scent fills every corner of your home, creating a warm, comforting atmosphere that instantly makes everyone feel happy and hungry. That golden, crispy outer crust gives a loud, satisfying crunch when you slice into it with a sharp knife, revealing a soft, airy, and bouncy center inside that holds tiny pockets of garlic and herbs in every single bite. It offers the exact same high quality texture and taste that you would expect from an artisan bakery, but it costs only a tiny fraction of the price to make at home using basic pantry staples. Once you realize how easy it is to mix a few basic ingredients together in a single bowl and let time do the rest, you will likely never want to buy plain, store bought white bread from the grocery store ever again.
There are so many perfect reasons and special occasions to bake this lovely loaf, whether you are cooking for a big family dinner or just enjoying a peaceful quiet weekend by yourself. Making fresh bread is a deeply soothing emotional experience that helps you slow down from the busy rush of everyday life and reconnect with the simple joys of home cooking. Sharing a warm, freshly baked loaf with family, friends, or neighbors is one of the most loving and generous gestures you can offer, bringing people together around the dinner table with genuine smiles. From a taste perspective, this fragrant savory loaf elevates any meal instantly, serving as the ultimate companion for dipping into hot bowls of rich tomato soup, soaking up tasty pasta sauces, or serving alongside colorful charcuterie boards with fine cheeses. Even from a fitness and health angle, preparing your own bread at home allows you complete control over every single ingredient that enters your body. You do not have to worry about unwanted chemical preservatives, artificial additives, hidden high fructose corn syrup, or strange industrial dough conditioners that are commonly added to commercial grocery store breads to extend shelf life.
This beginner friendly recipe is designed specifically to build your confidence in the kitchen while keeping the entire baking process completely stress free and enjoyable. If you have always been intimidated by yeast or worried that your bread would turn out dense and hard as a rock, this reliable no knead approach is the absolute safest way to start your home baking journey. Because the dough requires very little hands on preparation time, you can quickly mix everything together in just five minutes before going to bed, and wake up the next morning to dough that is fully expanded, bubbly, and ready for the hot oven. It fits effortlessly into any busy daily schedule, allowing you to enjoy fresh, hot, gourmet artisan bread whenever the craving strikes without spending hours tied to the kitchen counter. Whether you are hosting a festive holiday gathering, preparing a romantic cozy dinner, or simply looking for a fun weekend cooking project, this rosemary garlic bread will quickly become a cherished favorite recipe in your household that you turn to again and again.
Ingredients You Will Need
To prepare this beautiful loaf, gather the following simple, high quality ingredients in these exact quantities:
3 and a half cups of all purpose flour or unbleached bread flour (plus extra flour for dusting)
1 and three quarters cups of lukewarm clean water (around 105 degrees Fahrenheit)
1 teaspoon of active dry yeast or instant yeast
1 and a half teaspoons of fine sea salt or kosher salt
3 tablespoons of fresh rosemary leaves, finely chopped
1 whole head of fresh garlic (or 6 to 8 cloves of peeled fresh garlic)
2 tablespoons of extra virgin olive oil (divided use)
1 half teaspoon of coarsely cracked black pepper (optional for extra warmth)
1 quarter teaspoon of coarse flaky sea salt for sprinkling on top before baking
Step by Step Method
Step 1: Roast the Fresh Garlic
Start by preheating your oven to 400 degrees Fahrenheit. Take your whole head of fresh garlic and cut off the very top quarter using a sharp knife so the tops of the individual garlic cloves are exposed. Place the whole head of garlic on a square piece of aluminum foil. Drizzle 1 tablespoon of extra virgin olive oil directly over the exposed garlic cloves, allowing the oil to sink down into the crevices. Wrap the foil tightly around the garlic head to create a tiny sealed package. Place it in the hot oven and bake for roughly 40 to 45 minutes until the garlic cloves become completely soft, golden brown, and tender. Once roasted, remove the foil package from the oven carefully and let it cool down until you can handle it comfortably with your hands. Squeeze the soft roasted garlic cloves out of their skin into a small bowl, mash them gently with a fork, and set them aside to cool.
Step 2: Prepare the Dry Base
In a large glass or ceramic mixing bowl, add 3 and a half cups of flour, 1 and a half teaspoons of fine sea salt, 1 teaspoon of active dry yeast, and 3 tablespoons of finely chopped fresh rosemary. If you like a subtle hint of spice, you can also stir in 1 half teaspoon of cracked black pepper at this stage. Use a whisk or a wooden spoon to stir all the dry ingredients together thoroughly so that the yeast, salt, and herbs are distributed evenly throughout the flour mixture.
Step 3: Combine and Form the Wet Dough
Add your cooled, mashed roasted garlic into the dry flour bowl along with 1 tablespoon of extra virgin olive oil. Pour in 1 and three quarters cups of lukewarm water. Use a wooden spoon or a sturdy spatula to stir everything together gently. Keep stirring until all the dry flour is fully hydrated and a shaggy, wet, sticky dough forms in the bowl. Do not worry if the dough looks messy or uneven; that is completely normal for this type of recipe. Make sure there are no pockets of dry flour remaining at the bottom of the bowl. You do not need to knead or work the dough at all.
Step 4: The Long Fermentation Rest
Cover the mixing bowl tightly with a layer of plastic wrap or a clean, damp kitchen towel to keep the air out. Place the bowl in a warm, draft free spot on your kitchen counter. Let the dough rest undisturbed for at least 12 hours, though 18 hours is even better for developing deep flavor. During this long resting period, the yeast eats the sugars in the flour and creates carbon dioxide bubbles naturally. The dough will expand to double its original size, becoming very soft, bubbly, and fragrant with a wonderful yeasty herb aroma.
Step 5: Shape the Dough
After the long fermentation rest, lightly dust a clean work surface or parchment paper with a few tablespoons of flour. Use a spatula to gently scoop the sticky dough out of the bowl and onto the floured surface. The dough will be soft and loose. Dust your hands with a little extra flour and gently fold the edges of the dough over toward the center a few times to create a round ball shape. Place the shaped dough ball seam side down onto a large piece of parchment paper. Cover the dough loosely with a clean towel and let it rest for another 30 to 45 minutes to rise slightly while you prepare the oven.
Step 6: Preheat Your Heavy Pot
While your shaped dough is having its final short rest, place a heavy 5 to 7 quart Dutch oven pot with its lid on onto the middle rack of your cold oven. Turn the oven heat up to 450 degrees Fahrenheit. Allow the empty heavy pot to preheat inside the hot oven for at least 30 minutes. Heating the heavy pot is the main secret to creating a crisp, golden bakery crust because it traps steam around the dough during the first phase of baking.
Step 7: Bake with Steam
Carefully remove the extremely hot Dutch oven pot from your oven using thick oven mitts and set it safely on a heatproof surface. Take off the hot lid. Lift the dough ball by holding the corners of the parchment paper and gently lower both the paper and the dough directly inside the preheated pot. Drizzle a tiny drop of olive oil on top of the dough ball and sprinkle 1 quarter teaspoon of coarse flaky sea salt over the crust. Place the heavy lid back onto the pot to seal in the steam. Return the pot to the hot 450 degree oven and bake with the lid closed for 30 minutes.
Step 8: Uncover for Golden Crispiness
After 30 minutes of baking with the lid on, carefully remove the lid from the pot. You will see that the loaf has expanded nicely inside. Leave the pot uncovered and continue baking in the oven for an additional 15 to 20 minutes until the top crust turns a rich, deep golden brown color and feels firm when tapped.
Step 9: Cool Completely Before Slicing
Once fully baked, remove the pot from the oven carefully. Use the edges of the parchment paper to lift the hot loaf out of the pot and place it onto a wire cooling rack. Allow the fresh bread to cool down completely for at least 30 to 45 minutes before cutting into it. Slicing warm bread too quickly can trap steam inside and make the interior crumb gummy, so exercising a little patience will yield the perfect light and fluffy texture.
Why This Recipe Is Special
This unique recipe stands out from traditional baking methods because it completely eliminates the need for intensive physical labor. Kneading dough by hand requires significant upper body strength and perfect timing, which can be discouraging for beginner bakers. By allowing time to naturally break down gluten proteins and build structure, anyone can achieve master level baking results right from their home kitchen without tiring out their arms or wrists.
Another wonderful benefit of this method is its reliance on wholesome, real food ingredients. Grocery store loaves often contain additive chemicals, hidden sugars, synthetic oils, and artificial softening agents to keep them fresh on shelves for weeks. In contrast, this homemade recipe uses basic pantry items that you can trust. Fresh rosemary delivers natural plant compounds, while slow roasted garlic adds sweet richness without relying on artificial garlic powders or heavy salt blends.
From a nutritional perspective, the long fermentation process offers real digestion benefits. As the yeast works slowly over many hours, it pre digests starches in the flour, making the bread much gentler on your digestive system compared to quick rise commercial products. The addition of extra virgin olive oil provides heart healthy fats that keep the crumb tender while enhancing the absorption of fat soluble plant nutrients found in fresh green herbs.
Extra Tips for Better Taste
To take your homemade loaf to an even higher culinary level, consider roasting two full heads of garlic instead of just one. Doubling the garlic amount allows you to keep half mashed inside the dough while leaving the remaining cloves whole to fold in during shaping. Finding whole, soft, sweet roasted garlic pockets hidden inside a warm slice creates an unforgettable surprise for garlic lovers.
You can also experiment with creative herb combinations to match your personal taste preferences. While fresh rosemary offers a piney aroma, combining it with fresh thyme, oregano, or chopped sage creates a multidimensional Tuscan flavor profile. If fresh herbs are unavailable, high quality dried herbs will work, though reducing the quantity to 1 tablespoon is recommended because dried herbs possess concentrated flavors.
For an extra touch of richness, grate 1 half cup of aged parmesan, pecorino romano, or sharp cheddar cheese over the dough right before folding it into a round shape. As the loaf bakes at high heat, the cheese melts into pockets within the crumb and forms a crisp, savory cheese crust on the bottom exterior of the loaf.
Storage and Reheating Advice
Keep your baked loaf stored at room temperature wrapped loosely in a clean paper bag or a cotton bread bag for up to three days. Avoid storing fresh crusty bread in sealed plastic bags because trapped moisture softens the outer crust, causing it to lose its crunch. To enjoy a slice later, warm it in a toaster or place it in a 350 degree oven for 5 minutes to restore its freshly baked crispness.
Nutrition Details
Below is the estimated nutritional breakdown for this recipe, based on an average loaf yield of 10 generous slices:
Total Recipe Yield: 1 Loaf (10 Servings)
Serving Size: 1 Slice (approximately 80 grams)
Calories per serving: 185 kcal
Total Carbohydrates: 34 grams
Dietary Fiber: 2 grams
Sugars: 1 gram
Protein: 5 grams
Total Fat: 3.5 grams
Saturated Fat: 0.5 grams
Trans Fat: 0 grams
Monounsaturated Fat: 2.5 grams
Cholesterol: 0 milligrams
Sodium: 350 milligrams
Potassium: 85 milligrams
Iron: 2 milligrams
Calcium: 18 milligrams
Vitamin C: 2 milligrams
Final Thoughts
Baking a fresh loaf of no knead rosemary garlic bread at home is a simple, deeply satisfying process that brings immense joy into your kitchen. With just a handful of basic ingredients and a bit of patience, you can create a gorgeous, bakery quality loaf that delights your senses with its incredible aroma, crunchy crust, and soft savory interior. It proves that you do not need complex skills or fancy tools to enjoy nutritious, delicious food made from scratch. Give this accessible recipe a try, share a warm slice with the people you love, and enjoy every single crunchy bite.
Disclaimer
The nutritional values provided in this article are general estimates calculated for educational and informational purposes only. Actual nutritional content may vary based on specific ingredient brands, exact measurements, and cooking variations. Everyone has unique dietary requirements, health conditions, and digestive responses, so results can differ from person to person. If you have specific dietary restrictions, gluten sensitivities, or health concerns, please consult a qualified healthcare professional or certified nutritionist before making changes to your personal meal plan.