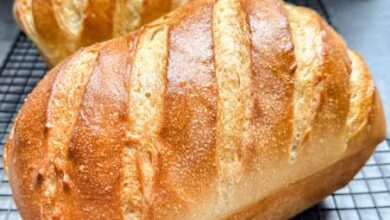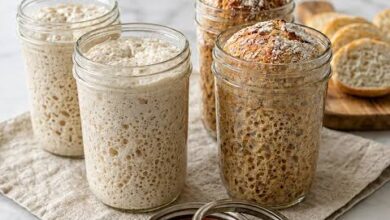
Welcome to the ultimate guide for making soft, fluffy, and delicious sourdough English muffins right in your own kitchen. This simple recipe is designed to help you transform basic pantry staples into warm and bubbly round breads that taste far better than store bought options. When you make these treats at home, you get complete control over every single wholesome ingredient that goes into your body. The process relies on natural wild yeast fermentation, which creates the famous small holes and nooks that hold melted butter so perfectly. Even if you are completely new to baking with a wild yeast starter, this easy guide will walk you through every step with clear explanations. You do not need any fancy bakery tools or special skills to achieve fantastic results on your very first try. By following these simple directions, you will learn how easy it is to bring traditional baking techniques into your modern morning routine.
People all around the world fall in love with these golden treats because they offer a wonderful combination of gentle sour flavor and pleasant chewy texture. Store bought versions often feel dry or spongy, but fresh homemade sourdough brings a rich depth of flavor that satisfies your appetite in a truly unique way. Children and adults alike enjoy the satisfying crunch of a split muffin toasted to golden brown perfection on a quiet weekend morning. You will find that baking these at home fills your kitchen with a cozy smell that makes your entire home feel warm and inviting. Friends and family will constantly ask you to share your batch whenever they come over for breakfast or brunch. The joy of pulling hot muffins off a warm skillet creates lasting kitchen memories that turn simple cooking into a deeply rewarding hobby.
Making these delights fits wonderfully into almost any lifestyle, whether you are focused on fitness, seeking emotional comfort, or just wanting delicious meals. For those focused on physical health, natural sourdough fermentation breaks down complex grains, making the bread much easier on your stomach while providing steady daily energy. If you are looking for emotional warmth, kneading and shaping soft dough serves as a peaceful activity that helps clear your mind after a busy week. You can prepare these as a practical weekly meal prep solution so you always have wholesome breakfast options ready in your freezer. Pulling a muffin out of the freezer on a rushed morning gives you a fast and nutritious food choice that keeps you full until lunchtime. It is always the right time to make a fresh batch because they bring comfort during cold winter mornings and convenience during quick summer picnics.
Taking the time to bake your own sourdough breads helps you reconnect with wholesome cooking traditions that prioritize health and great taste. Many commercial breads contain preservatives, artificial additives, and unnecessary extra sugars to extend shelf life on store shelves. When you take charge of your ingredients, you ensure that every slice contains pure nourishment without any hidden chemicals or unnatural fillers. You will quickly notice how much lighter and refreshed you feel after eating real naturally fermented grain products compared to processed factory products. This guide provides all the necessary knowledge to ensure your baking journey is fun, stress free, and completely successful from start to finish. Get your simple cooking equipment ready and let us explore the delightful world of fresh homemade baking together today.
Ingredients You Will Need
- 100 grams active sourdough starter
- 240 grams warm whole milk
- 400 grams unbleached bread flour
- 15 grams granulated white sugar
- 7 grams fine sea salt
- 30 grams unsalted butter softened at room temperature
- 50 grams coarse cornmeal for coating the cooking surface
Step by Step Method
Step 1 Preparing The Dough Base
Begin by taking a large clean mixing bowl and placing it on a flat surface. Pour your warm whole milk into the bowl, making sure the liquid is gentle to the touch and not hot. Stir in the active sourdough starter using a wooden spoon until the mixture becomes smooth and milky. Add the sugar to the liquid and mix gently until all the sweet crystals completely dissolve. Carefully pour in the unbleached bread flour and the sea salt over the wet mixture. Use your spoon or clean hands to mix everything together until a shaggy dough forms without any dry flour remaining at the bottom of the bowl. Cover the bowl loosely with a damp towel and let it rest on your counter for twenty minutes to allow the flour to absorb the wet ingredients completely.
Step 2 Adding Butter and Kneading
After the short resting period, remove the damp towel from your bowl. Add the softened unsalted butter directly on top of the shaggy dough. Use your hands to stretch and fold the dough over itself, squeezing gently to work the soft butter into the structure. The dough may feel slippery at first, but keep mixing gently for about five minutes until the butter is fully absorbed. Move the dough onto a clean, lightly floured cutting board or countertop. Knead the dough smoothly by pushing it forward with the heel of your hand and folding it back toward you. Continue kneading for about eight to ten minutes until the dough becomes smooth, stretchy, and slightly tacky.
Step 3 First Fermentation Period
Form the kneaded dough into a neat round ball using your palms. Place the ball into a lightly oiled bowl so it does not stick during the rising phase. Cover the top of the bowl tightly with plastic wrap or a snug silicon lid to keep moisture inside. Place the bowl in a warm spot in your kitchen away from cold windows or drafts. Allow the dough to rest and rise for about six to eight hours until it grows significantly in size and looks puffy. You can also let the dough rise slowly in the refrigerator overnight if you want to split the work across two separate days.
Step 4 Shaping The Individual Rounds
Dust a large baking sheet generously with a thick layer of coarse cornmeal. Gently tip your risen dough out of the bowl onto a lightly floured surface without flattening all the lovely air bubbles inside. Use a rolling pin to roll the dough out evenly until it is about three quarters of an inch thick. Take a round cutter or the open rim of a drinking glass to cut out circular shapes from the dough. Place each cut dough round onto the prepared baking sheet covered in cornmeal. Gather any remaining dough scraps, press them gently together, roll again, and cut additional shapes until all dough is used. Sprinkle extra cornmeal over the tops of each round so both sides have a nice crunchy coating.
Step 5 Final Proofing Phase
Cover the tray holding your cut dough rounds loosely with a lightweight kitchen towel. Let them rest on the counter at room temperature for about one to two hours. During this final proofing period, the shapes will puff up gently and feel soft and pillow like when touched lightly with a finger. Watch them closely so they do not over rise, which could cause them to deflate during the skillet cooking process.
Step 6 Cooking On The Skillet
Heat a heavy cast iron skillet or flat griddle over low heat on your stove top. It is very important to keep the temperature low so the insides cook completely without burning the outer crust. Gently transfer a few dough rounds into the dry skillet, leaving space between each item. Cook the muffins on the first side for about seven to nine minutes until the bottom turns a deep golden brown color. Flip each round carefully using a flat spatula and cook the second side for another seven to nine minutes. The muffins should feel firm along the edges and sound hollow when tapped lightly on the top surface. Remove the warm muffins from the pan and let them cool completely on a wire rack before cutting.
Why This Recipe Is Special
This sourdough recipe stands out because it combines incredible natural flavor with impressive health benefits for everyday living. Natural fermentation uses wild yeasts and helpful bacteria to break down tough starches and gluten proteins in the wheat flour. This slow natural process makes the final product much easier to digest for people who feel bloated after eating standard factory made breads. The naturally produced lactic acid gives the bread a mild sour taste that pairs wonderfully with sweet jams, savory eggs, or rich cheeses.
In addition to easy digestion, these homemade muffins offer better nutritional value than standard white loaf options. Sourdough fermentation increases the availability of important minerals like magnesium, zinc, and iron present in the wheat grains. Because you make these at home, you avoid artificial dough conditioners, high fructose corn syrup, and harsh preservatives often found in commercial packages. Eating pure and real food supports long term wellness while giving you long lasting energy without sudden blood sugar spikes.
The satisfying texture of these skillet cooked delights is another major reason why this recipe remains a favorite choice. Cooking the dough slowly on a flat griddle produces a outer crust with a distinct cornmeal crunch while keeping the inside extremely soft. The internal structure develops natural air pockets that trap butter, honey, or sauces delightfully well. Making your own batch brings real pride and immense satisfaction that makes simple daily breakfasts feel like special dining events.
Extra Tips For Better Taste
- Always use a fork to split your cooked muffin open instead of a sharp knife to preserve the inner air pockets and texture.
- Make sure your sourdough starter is fully active and bubbly before you begin mixing your ingredients together.
- Use real whole milk instead of skim milk to give the dough a rich flavor and a extra soft inner crumb.
- Maintain very low heat on your skillet during cooking to prevent burning the cornmeal before the center cooks through.
- Toast the split pieces lightly in a toaster or under a broiler before serving to create maximum outer crunch.
- Store fully cooled extra muffins in an airtight bag at room temperature for up to three days or freeze them for up to three months.
Final Thoughts
Baking your own sourdough treats at home is a fun and deeply satisfying journey that brings joyful aromas to your daily life. With just a handful of basic ingredients and a bit of patience, you can create rustic breads that taste far superior to store bought items. Enjoy sharing these warm golden rounds with your family during quiet mornings or packing them for quick meals on busy work days. Once you master this clear and simple process, you will love experimenting with your favorite toppings and enjoy wholesome baking for many years to come.
Nutrition Details
| Item | Measurement Per Serving |
| Serving Size | 1 muffin |
| Calories | 185 kcal |
| Total Carbohydrates | 34 grams |
| Dietary Fiber | 2 grams |
| Sugars | 2 grams |
| Protein | 6 grams |
| Total Fat | 3 grams |
| Saturated Fat | 1.5 grams |
| Cholesterol | 7 milligrams |
| Sodium | 270 milligrams |
| Calcium | 45 milligrams |
| Iron | 1.8 milligrams |
Disclaimer
This guide and recipe are intended purely for educational and informational purposes for home cooks. Everyone has a unique body with distinct dietary needs, digestive capabilities, and personal health requirements. Sourdough fermentation reduces gluten density but does not eliminate it entirely, so individuals with severe wheat allergies or celiac disease should exercise caution. Nutritional numbers provided in this article are general estimates and may vary based on specific ingredient brands used in your kitchen. Always listen to your own body and consult with a qualified health professional regarding any specific dietary concerns.