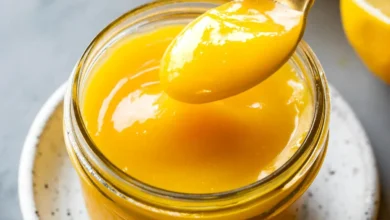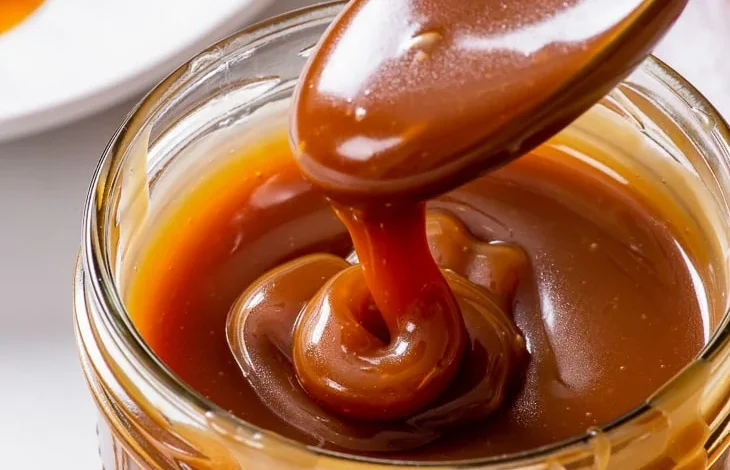
Making sweet treats at home brings a special kind of joy that very few other activities can match in your kitchen. Homemade salted caramel sauce is one of those magic recipes that can instantly turn a simple day into a lovely celebration. When you take basic kitchen items like sugar, butter, and heavy cream and transform them into a smooth golden liquid, it feels like pure kitchen magic. The rich smell that fills your entire house while the sugar melts is warm, buttery, and deeply comforting. Learning how to make and preserve your own jar of sweet liquid gold allows you to capture that marvelous baker aroma whenever you open your pantry door. Canning this delightful sauce means you will always have a high quality topping ready to pour over warm desserts, fresh fruit slices, or even your morning coffee. It is a wonderful way to bring homemade goodness into your daily lifestyle without having to start cooking from scratch every single time you crave something sweet and luxurious.
People all around the world fall deeply in love with this rich topping because it creates a perfect balance of contrasting flavors on your tongue. The deep sweetness of burnt brown sugar meets the rich creamy texture of dairy, and then a bright touch of pure sea salt cuts right through the heavy sugar taste. This beautiful combination creates a flavor profile that makes your taste buds wake up and ask for another full spoon. Store bought caramel products often taste like plain corn syrup and artificial flavoring, but making it yourself gives you a clean butter flavor that feels soft and real. The velvety smooth texture glides over your mouth in a way that feels extra fancy and cozy at the same time. Once you taste a fresh batch made on your own stove, it becomes almost impossible to go back to buying plastic squeeze bottles from the grocery store.
There are so many wonderful reasons and special occasions to prepare a big batch of this liquid delight in your kitchen. If you love entertaining guests or family during holiday dinners, having filled glass jars stored safely in your kitchen cupboard saves you a massive amount of time during busy party prep. It also makes one of the most charming homemade gifts for your friends, teachers, and neighbors when you want to show real care and love. For people who focus on balanced eating or fitness goals, making your own treats at home gives you complete control over every ingredient you put into your body. You do not need to consume hidden chemicals, weird oil additives, or strange synthetic colors that big commercial food factories usually add. You can enjoy a small tablespoon of real butter and pure sugar as a rewarding post workout treat or a weekend reward without worrying about mysterious factory preservatives.
Taking on this simple cooking project will boost your kitchen confidence and give you a huge sense of creative accomplishment. Sugar work can sometimes sound scary to beginner home cooks, but following a steady process makes the entire journey safe and simple. Watching the pure white crystals dissolve and slowly turn into a deep reddish amber color is a peaceful and rewarding sight. Canning the finished sauce extends its shelf life so you can enjoy the fruits of your effort for many weeks ahead. It is a wonderful weekend project to do with family members or as a relaxing solo cooking session to unwind after a busy work week. By the time you seal your final clear glass jar, you will have a beautiful homemade product that looks like it came from an expensive gourmet gift shop.
Ingredients You Will Need
To make a large batch of smooth caramel sauce that fills roughly four small glass jars, gather the following simple kitchen items:
-
White granulated sugar: 4 cups
-
Unsalted high quality butter: 1 cup, cut into small cubes at room temperature
-
Heavy whipping cream: 2 cups, warmed slightly so it is not cold
-
Fine sea salt or pink Himalayan salt: 2 teaspoons
-
Pure vanilla extract: 2 teaspoons
-
Fresh filtered water: 1 cup
Step by Step Method
-
Clean four small glass jars along with their metal lids in warm soapy water, rinse them well, and keep them warm in a deep pot filled with hot water so the glass does not break when hot caramel touches it later.
-
Place a large heavy bottom pot on your stove, because sugar bubbles up very high when liquid is added later, so a deep pot keeps you clean and safe.
-
Pour the white granulated sugar and fresh filtered water into the pot, giving it one gentle stir at the start to mix the sugar and water evenly.
-
Turn your stove heat to medium high and allow the water and sugar mixture to come to a full boiling state without stirring it anymore.
-
Let the mixture boil gently while watching it closely as the water evaporates and the liquid sugar begins to change color from clear to light yellow and finally to a rich reddish amber tone.
-
Swirl the pot gently by its handle every few minutes to spread the heat evenly, avoiding metal spoons because stirring can make the sugar form hard crunchy crystals.
-
Once the sugar reaches a beautiful golden amber color, turn the heat down to low immediately so the sugar does not burn and turn bitter.
-
Carefully add the room temperature butter cubes into the hot melted sugar, whisking continuously as the mixture bubbles up rapidly.
-
Slowly pour in the warm heavy whipping cream while keeping your whisk moving, taking great care because the cold liquid will cause the hot sugar mixture to steam and bubble very high.
-
Keep stirring the sauce on low heat for about two to three minutes until all the butter and cream are completely blended into a smooth liquid.
-
Remove the pot completely from the hot stove burner, then whisk in the fine sea salt and the pure vanilla extract until completely smooth.
-
Carefully lift your clean warm glass jars out of the hot water pot using tongs, placing them on a clean cloth towel on your kitchen counter.
-
Pour the hot caramel sauce into each warm glass jar using a clean funnel, leaving about half an inch of empty space at the top of each jar.
-
Wipe the top rim of each glass jar with a clean damp cloth to remove any sticky sweet drops so the metal lid can seal perfectly.
-
Place the flat metal lid on top of each jar and screw the metal ring band on until it is finger tight, meaning do not force it too tight.
-
Put the filled glass jars back into your deep pot of hot water, making sure the water level covers the top of the jars by at least one full inch.
-
Bring the water pot to a full rolling boil, put the pot lid on, and let the jars process in the boiling water for fifteen full minutes.
-
Turn off the heat after fifteen minutes, remove the pot lid, and let the jars rest inside the hot water for five extra minutes to settle the pressure.
-
Lift the jars carefully out of the water using jar tongs and set them upright on a dry towel on your counter, leaving space between each jar.
-
Allow the jars to cool down completely at room temperature for twelve to twenty four hours without moving or touching them.
-
Listen for a satisfying popping sound as the jars cool, which tells you the vacuum seal has worked properly and the center of the metal lid stays flat when pressed down.
-
Store your sealed jars in a cool dark pantry, or put any unsealed jars straight into your refrigerator to enjoy over the next few weeks.
Why This Recipe Is Special
This homemade salted caramel recipe is truly special because it brings back pure basic cooking without reliance on factory processing. When you buy commercial sauces from the store, you are often paying for extra water, thickeners like cornstarch, and artificial chemical preservatives designed to keep products sitting on store shelves for years. Making this at home means every single spoon contains pure milk fat, real sugar, and natural sea salt. The flavor quality is vastly superior because fresh butter gives a deep richness that synthetic oils can never duplicate. You get to enjoy a luxury food item made right in your own kitchen for a fraction of what gourmet gift shops charge.
From a lifestyle standpoint, choosing real homemade sweets allows you to practice mindful eating and keep your food choices transparent. You know every single ingredient that went into the pot, which brings total peace of mind for you and your family members. Salted caramel also offers a wonderful sensory experience that reduces stress through the creative process of cooking. The addition of natural sea salt helps soften the heavy sugar load on your mouth, making the treat feel balanced rather than sickeningly sweet. It is a wonderful way to bring comfort into your routine while keeping your pantry stocked with real food made by your own hands.
Extra Tips for Better Taste
-
Use a heavy bottom pot made of stainless steel or enamel, because thin aluminum pots create hot spots that burn sugar very quickly.
-
Make sure your cream and butter are not cold from the fridge, as warm dairy blends much smoother into hot melted sugar without spattering.
-
Try using high quality coarse sea salt crystals if you want tiny bursts of saltiness hidden inside the smooth sweet liquid.
-
Add a small pinch of ground cinnamon or espresso powder along with the vanilla extract to create a deeper autumn flavor profile.
-
Do not leave the stove for even a single minute while the sugar boils, because sugar moves from perfect amber color to burnt black in just a few seconds.
-
If your sugar forms hard white lumps during the process, keep the heat low and continue whisking gently until the heat melts the sugar back down.
-
Serve this golden sauce warm over plain vanilla ice cream, baked apple slices, thick pancakes, or stirred into a cup of warm milk.
Final Thoughts
Creating your own canned salted caramel sauce is a deeply satisfying kitchen project that brings warmth and delicious sweetness to your home. It shows how simple everyday ingredients can come together to build something truly special and elegant. Whether you plan to give these lovely jars as heartfelt gifts or keep them tucked away in your pantry for sweet cravings, this recipe will quickly become a favorite in your cooking collection. Take your time, enjoy the cozy buttery smells lingering in your kitchen, and celebrate the simple fun of making real food from scratch.
Nutrition Details
Nutrition facts can vary based on the specific brand of dairy and butter you choose to buy at your local market. Here is an estimated average nutrition breakdown per serving, based on a serving size of two tablespoons of finished sauce:
| Nutrient | Amount Per Serving |
| Calories | 140 kcal |
| Total Fat | 7 grams |
| Saturated Fat | 4.5 grams |
| Trans Fat | 0 grams |
| Cholesterol | 20 milligrams |
| Sodium | 190 milligrams |
| Total Carbohydrates | 19 grams |
| Dietary Fiber | 0 grams |
| Sugars | 19 grams |
| Protein | 0 grams |
Disclaimer
This article is written for general informational, recreational, and educational purposes only. Individual dietary needs, metabolic responses, and health conditions vary greatly from person to person. Sugar and dairy products affect every body differently, so always listen to your personal health needs and consult a qualified medical professional or registered dietitian if you have questions about managing sugar intake, dietary restrictions, or individual health goals.