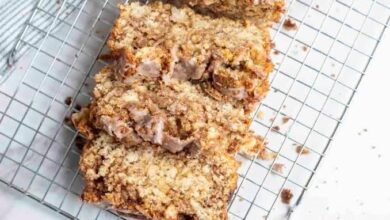
If you love sourdough but prefer a soft, sliceable loaf perfect for sandwiches and toast, this Soft Crust Sourdough Sandwich Bread is the ideal recipe. It combines the mild tang of natural fermentation with a tender crumb and golden, soft crust — perfect for daily use.
Unlike rustic artisan sourdough with its chewy crust and open crumb, this bread is enriched with a bit of fat and milk to keep the interior fluffy and the exterior soft. It’s made to be practical — great for sandwiches, grilled cheese, French toast, or simply with a spread of butter.
This recipe is designed to be beginner-friendly while still delivering the full flavor and health benefits of sourdough. With a simple overnight fermentation, you’ll have a fresh, preservative-free loaf ready the next day.
Cooking Time and Serving
-
Prep Time (active): 20 minutes
-
First Rise (bulk fermentation): 8–10 hours (overnight)
-
Second Rise (proof): 1.5–2 hours
-
Bake Time: 35–40 minutes
-
Total Time: ~12–14 hours (mostly hands-off)
-
Servings: 1 loaf (~12 slices)
Ingredients
For the Dough:
-
3 ½ cups (420g) bread flour
-
1 cup (240g) whole milk (or water for dairy-free)
-
½ cup (120g) active sourdough starter (fed and bubbly)
-
2 tbsp (25g) sugar or honey
-
2 tbsp (28g) unsalted butter, softened (or olive oil)
-
1 ½ tsp salt
Optional for brushing:
-
1 tbsp melted butter (for a softer top crust after baking)
How to Make Soft Crust Sourdough Sandwich Bread
1. Mix the Dough (Evening/Day 1):
In a large bowl or stand mixer, combine the milk, sourdough starter, and sugar/honey. Add the flour and mix until a shaggy dough forms. Add the softened butter and salt, and knead by hand or with a dough hook for 8–10 minutes until smooth and elastic.
2. Bulk Fermentation (Overnight):
Cover the bowl with a damp towel or plastic wrap. Let the dough rise at room temperature (ideally around 70–75°F) for 8–10 hours, or until it has doubled in size.
3. Shape the Dough (Morning/Day 2):
Lightly flour your surface. Turn the dough out, gently press it into a rectangle, and roll it tightly into a log. Place it seam-side down into a greased 9×5-inch loaf pan.
4. Final Proof:
Cover the loaf pan with a towel and let it rise in a warm place for 1.5–2 hours, or until the dough has risen about 1 inch above the rim of the pan.
5. Bake:
Preheat your oven to 375°F (190°C). Bake the loaf for 35–40 minutes, or until the top is golden and the loaf sounds hollow when tapped.
6. Cool:
Remove the bread from the pan and cool it on a wire rack. For an extra soft crust, brush the top with melted butter while still warm.
Notes
-
Active Starter: Ensure your sourdough starter is fed and bubbly before using for the best rise and flavor.
-
Milk Alternative: For a dairy-free version, replace milk with an equal amount of water and butter with olive oil.
-
Add-ins: For variety, you can add herbs, shredded cheese, or seeds to the dough before shaping.
-
Storage: Store in an airtight container at room temperature for up to 4 days. It also freezes well for up to 2 months.
FAQs
Q: Why is my bread dense?
A: This could be due to under-proofing, using an inactive starter, or cold kitchen temperatures. Make sure your starter is active and bubbly before baking.
Q: Can I use all-purpose flour instead of bread flour?
A: Yes, but the crumb may be slightly less chewy. Add 1–2 tbsp less liquid if using AP flour.
Q: Can I cold-proof this dough in the fridge?
A: Yes! You can shape the dough, place it in the pan, and let it rise in the refrigerator overnight. Let it come to room temperature before baking.
Q: How do I know when it’s done baking?
A: A thermometer inserted into the center should read around 195–200°F (90–93°C).
Nutrition Information (Per Slice, based on 12 slices per loaf)
| Nutrient | Amount |
|---|---|
| Calories | 170 kcal |
| Total Fat | 4 g |
| Saturated Fat | 2 g |
| Cholesterol | 10 mg |
| Sodium | 240 mg |
| Total Carbohydrates | 28 g |
| Dietary Fiber | 1 g |
| Sugars | 3 g |
| Protein | 5 g |
Nutrition may vary based on specific ingredients used.
Disclaimer
This recipe is for informational purposes only. Always consume bread and baked goods in moderation as part of a balanced diet. Individuals with food allergies (e.g., to gluten, dairy, or eggs) should carefully review the ingredients or consult a health professional before consuming.