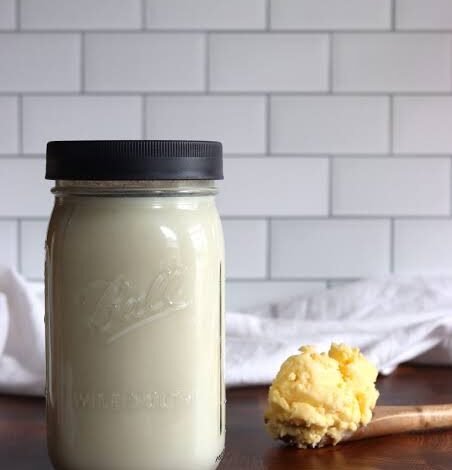
Making cream top yogurt right in your own kitchen is a wonderful experience that brings pure joy and delicious flavor to your daily routine. When you walk into a traditional dairy farm market or browse the specialty aisles of your local grocery store, you often see glass bottles of fresh milk topped with a thick, golden layer of cream. This wonderful product captures the very essence of traditional dairy farming where the rich cream naturally rises to the top before any homogenization process takes away its wholesome character. By learning how to create this wonderful style of yogurt at home, you connect with generations of culinary traditions that value pure ingredients, patience, and the simple magic of transformation. This guide will walk you through every single detail needed to master the art of making thick, creamy, and completely natural cream top yogurt without needing any fancy industrial equipment or complicated laboratory tools.
People truly fall in love with cream top yogurt because it offers a dual texture experience that regular store bought yogurts simply cannot match. When you scoop into a freshly chilled jar, the first thing your spoon meets is that velvety, rich layer of concentrated milk fat sitting right at the surface, which melts on your tongue like pure butter. Underneath that golden crown lies a smooth, tart, and deeply satisfying yogurt base that feels both nourishing and comforting with every single bite. Unlike mass produced commercial yogurts that rely on added gelatin, thickeners, or artificial stabilizers to achieve body, cream top yogurt achieves its incredible texture entirely through natural separation and gentle culturing. This authentic approach means you get a clean label product with zero mystery ingredients, letting you taste the true, unadulterated goodness of wholesome milk and active cultures in every spoonful.
There are many wonderful moments throughout the week when making a batch of homemade cream top yogurt becomes the best choice you can possibly make. You might decide to prepare a batch on a lazy Sunday afternoon so that you have a luxurious, ready to eat breakfast waiting for you during busy weekday mornings when every minute counts. Alternatively, you might want to treat yourself and your family to a wholesome afternoon snack that provides sustained energy and gut friendly probiotics without any of the heavy, refined sugars found in commercial snacks. From a fitness and wellness perspective, making your own yogurt lets you control the exact fat content and sweetness levels, making it a fantastic source of high quality protein and calcium to support your active lifestyle. Whether you are looking to improve your digestive health, trying to save money on expensive specialty dairy items, or simply enjoying the creative hobby of homemade cooking, this recipe delivers immense satisfaction.
Embarking on this delightful culinary adventure does not require you to be a professional chef or a dairy scientist because the process is surprisingly forgiving and straightforward once you learn the basic steps. All you really need is patience, careful attention to temperature control during the warming phase, and a clean environment to let the friendly bacterial cultures do their quiet work. As you watch the liquid milk transform into a rich, set yogurt over the course of a few hours, you will feel a genuine sense of accomplishment that turns a simple kitchen task into a deeply rewarding ritual. So gather your kitchen tools, clear off a cozy corner on your counter, and get ready to discover just how easy and enjoyable it is to craft your very own artisanal cream top yogurt from scratch.
Ingredients You Will Need
-
Whole Unhomogenized Milk: 4 cups (1 liter) of fresh, full fat, non-homogenized milk or farm fresh milk with the cream fully intact.
-
Plain Yogurt Starter: 2 tablespoons (30 milliliters) of fresh plain yogurt containing live and active bacterial cultures.
-
Filtered Water: 2 tablespoons (30 milliliters) at room temperature to help dissolve the starter smoothly.
-
Optional Honey or Maple Syrup: 1 tablespoon (15 milliliters) for a very mild touch of sweetness if desired, though completely optional for traditional tart yogurt.
Step by Step Method
To begin the wonderful process of crafting your homemade cream top yogurt, start by gathering all your ingredients and ensuring that your kitchen workspace, cooking pots, and storage jars are impeccably clean. Cleanliness is the most important secret to success when working with friendly bacteria, as it ensures that only your desired yogurt cultures grow and thrive during the incubation period. Pour your four cups of fresh unhomogenized whole milk into a heavy bottomed saucepan, making sure the pot is large enough to prevent any accidental boiling over as the liquid warms up on your stove.
Place the saucepan on your stove over medium heat and warm the milk slowly, stirring occasionally with a clean spoon to prevent the milk proteins from sticking or scorching at the bottom of the pan. You want to bring the milk very close to a gentle simmer, reaching a temperature of around 180 degrees Fahrenheit or 82 degrees Celsius, which helps restructure the whey proteins so the final yogurt sets up much firmer. Once the milk reaches this target temperature, remove the saucepan from the heat source immediately and place it on a heat-resistant mat or cool burner on your counter.
Allow the hot milk to cool down gradually without disturbing it, as this quiet cooling period is where the natural cream begins its journey upward to form that signature golden crown on the surface. You will want to let the milk cool until it reaches a comfortable warm temperature between 110 and 115 degrees Fahrenheit or 43 and 46 degrees Celsius, which you can easily test by placing a clean finger into the liquid. If the milk feels pleasantly warm like a warm bathwater without burning your skin, it is at the absolute perfect temperature to introduce your live bacterial yogurt cultures safely.
While the milk is cooling down to the correct temperature, prepare your active yogurt starter by mixing the two tablespoons of plain active yogurt with two tablespoons of room temperature filtered water in a small bowl. Whisk this mixture gently until it becomes completely smooth and free of any stubborn lumps, ensuring that the active bacteria are evenly distributed and ready to blend seamlessly into your warm milk. Once your milk has reached the proper temperature range, take a small cup of the warm milk and stir it into your starter bowl to gently warm up the bacteria before adding them to the main pot.
Gently pour this warmed starter mixture into your large pot of warm milk, stirring very slowly and carefully for about thirty seconds to distribute the cultures throughout the liquid without disturbing the rising cream layer too much. After stirring, cover your saucepan with a clean lid or a breathable kitchen cloth to keep out dust while allowing the mixture to breathe slightly as the magic of fermentation begins. Now you need to find a warm, draft-free spot in your kitchen where the pot can rest undisturbed for the next six to eight hours while the friendly bacteria convert the natural milk sugars into lactic acid.
If your kitchen is naturally cool or drafty, you can place the covered pot inside your oven with the oven light turned on, or inside a turned off microwave with a bowl of warm water next to it to create a cozy incubator environment. Avoid moving, shaking, or checking on the pot during this incubation period, because any sudden jolts can disrupt the delicate milk proteins as they form a lovely, cohesive gel structure. After about six hours have passed, gently check the consistency of your yogurt by tilting the pot very slightly to see if the surface has set firmly and pulls away cleanly from the sides of the pan.
Once you are happy with the firm set of your yogurt, carefully transfer the entire pot or pour the contents into clean glass storage jars without mixing up the gorgeous layer of cream resting peacefully at the top. Place your freshly made yogurt containers directly into the refrigerator and let them chill thoroughly for at least four hours before serving, as this cold resting phase allows the flavor to mature and the cream layer to firm up delightfully. When you are ready to enjoy your creation, take a large spoon and scoop straight down through the golden cream top and into the tart yogurt below to experience the ultimate homemade dairy treat.
Why This Recipe Is Special
This homemade cream top yogurt is truly special because it brings back the authentic flavors and textures of traditional dairy that industrial manufacturing methods left behind decades ago. By using fresh unhomogenized milk, you preserve the natural fats in their original state, giving you a luxurious mouthfeel that feels rich and satisfying without needing any artificial additives or extra heavy cream additions. The natural fermentation process creates a powerhouse of live probiotics that work wonders for your digestive system, supporting a healthy gut microbiome and boosting your overall daily vitality in a completely natural way. Furthermore, crafting your own yogurt at home gives you complete transparency over every single ingredient, ensuring that you and your loved ones consume only pure, wholesome food free from chemical preservatives and hidden refined sugars. The delicate balance of natural tartness combined with the velvety richness of the cream top makes every single spoonful feel like an expensive artisanal luxury created right in your own kitchen.
Extra Tips for Better Taste
-
Choose the Right Milk: Always look for farm fresh, non-homogenized, or creamline milk from local dairy farms to get the thickest and most authentic cream layer possible on your finished yogurt.
-
Maintain Steady Warmth: Keep the incubation environment consistently warm and stable by utilizing an oven with just the interior light on, ensuring your beneficial bacteria work at their absolute peak performance.
-
Patience with Chilling: Never skip the final refrigeration step, as letting the yogurt rest and chill for a full four hours or overnight helps the flavors deepen and firms up the texture remarkably.
-
Flavor Variations: While traditional plain yogurt is magnificent on its own, you can customize individual servings by swirling in fresh seasonal berries, a drizzle of raw honey, or a pinch of toasted nuts right before eating.
-
Save Your Starter: Always reserve two tablespoons of your current batch of yogurt to use as the active starter for your next batch, saving you money and keeping your local bacterial strain thriving.
Final Thoughts
Making your own cream top yogurt at home is a wonderfully rewarding journey that transforms simple everyday ingredients into something truly extraordinary and nourishing for your body. The gentle rhythms of warming milk, introducing cultures, and waiting patiently for the magic of fermentation connect us to timeless culinary traditions that celebrate simplicity and wholesome nutrition. Whether you enjoy a bowl topped with fresh fruit for your morning breakfast or use it as a creamy base for savory dips later in the day, your homemade creation will always taste vastly superior to anything bought off a store shelf. We hope this guide inspires you to roll up your sleeves, embrace the joy of scratch cooking, and enjoy every single creamy bite of your homemade yogurt masterpiece.
Nutrition Details
| Nutrient Component | Amount Per Serving | Daily Value Percentage |
| Calories | 170 kcal | 8 percent |
| Total Fat | 10 grams | 15 percent |
| Saturated Fat | 6 grams | 30 percent |
| Cholesterol | 30 milligrams | 10 percent |
| Sodium | 100 milligrams | 4 percent |
| Total Carbohydrates | 12 grams | 4 percent |
| Dietary Fiber | 0 grams | 0 percent |
| Total Sugars | 12 grams | Not Established |
| Protein | 8 grams | 16 percent |
| Calcium | 300 milligrams | 30 percent |
Note: The nutritional values provided in the table above are approximate estimates calculated based on standard whole milk measurements and may vary depending on the specific brand and exact fat content of the milk you choose to use.
Disclaimer
The nutritional information, recipes, and dietary suggestions provided in this article are intended solely for general informational and educational purposes and should not be construed as professional medical advice, diagnosis, or treatment recommendations. Every individual body is completely unique, with different metabolic rates, dietary requirements, and health conditions, meaning that personal responses to specific foods, dairy products, or dietary modifications can vary significantly. If you have any underlying medical conditions, food allergies, lactose sensitivities, or specific dietary restrictions, you should always consult with a qualified healthcare professional or registered dietitian before making major changes to your daily diet