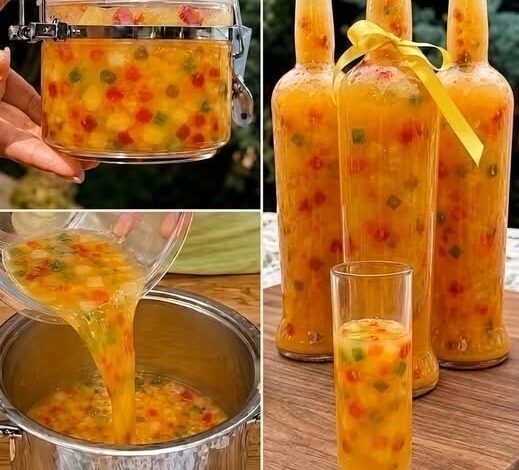
Making your own canned fruit punch at home is one of the most rewarding kitchen projects you can ever start today. This recipe is all about taking fresh juicy fruits and turning them into a delicious shelf stable drink that brings pure happiness in every single glass. Instead of buying commercial juices that contain artificial colors and chemical preservatives, you are creating a wholesome drink using real ingredients. The canning process locks in the bright original colors and sweet tangy flavors of fresh fruits so you can enjoy them anytime during the year. Whether you have an abundance of seasonal fruits from your backyard garden or you picked up a great deal at your local farmers market, this canning method preserves every bit of goodness. You will love how simple and satisfying it is to fill clean glass jars with rich beautiful fruit punch and seal them safely for future enjoyment.
People absolutely adore this homemade fruit punch because it offers an authentic taste that store bought brands simply cannot replicate. When you open a freshly sealed jar months down the road, you are greeted by an incredible aroma that instantly reminds you of warm sunny days and fresh summer harvests. Families love serving this drink at family gatherings because kids and adults alike enjoy its smooth refreshing profile. It gives parents total peace of mind knowing exactly what goes into their food and beverages without hidden ingredients or extra artificial high fructose corn syrup. Additionally, the deep natural color looks stunning in clear glassware, making any simple meal feel like a festive special occasion. Every sip brings a balance of natural sweetness and light tartness that makes everyone ask for a second glass.
There are so many wonderful moments when making and opening a jar of this fruit punch makes perfect sense. Emotionally, opening a preserved jar during cold winter days brings back sweet memories of warm summer afternoons and family harvest time. From a taste perspective, it provides an unbeatable thirst quenching sensation after a long busy day or during hot outdoor celebrations. For people who care about fitness and clean eating, this drink can be a much better option compared to commercial soda pops and heavily processed artificial drinks. You can customize the sugar level to match your energy requirements or dilute it with sparkling mineral water for a lighter post workout drink. Preserving your own juice also supports a sustainable lifestyle by minimizing food waste whenever fresh fruits are abundantly available in your kitchen.
Beyond all the practical benefits, canning fruit punch creates a wonderfully comforting tradition that connects you with classic home cooking methods. Preparing the fruit, gently simmering the juices, and listening to the cozy pop of jar lids sealing tightly builds a strong sense of personal satisfaction. You can share filled jars with neighbors, host cheerful afternoon tea parties, or store them neatly on your pantry shelves for unexpected guests. Having high quality homemade drinks ready on demand saves time and money while adding a touch of rustic charm to your daily life. Preserving food yourself gives you complete control over your family nourishment and allows you to build a well stocked pantry filled with pure delightful flavors.
Ingredients You Will Need
Fresh apples washed and chopped into medium chunks, six whole pounds Fresh ripe berries such as strawberries, raspberries, or blueberries, four total cups Fresh sweet oranges peeled and sliced into thick rounds, four medium whole oranges Fresh juicy lemons peeled and sliced into clean rounds, two large whole lemons Granulated white sugar or raw cane sugar, three cups according to your sweet taste preference Filtered clean water, twelve total cups Bottled lemon juice for consistent safe acidity level, one half cup
Step by Step Method
Step One: Wash all your fresh fruits thoroughly under cold running tap water to remove any dirt or residue. Chop the apples into medium chunks without worrying about peeling them because the skins add wonderful natural color and rich flavor to the batch. Peel the fresh oranges and lemons carefully, making sure to remove most of the bitter white pith before slicing them into clean thick rounds. Pick through your chosen fresh berries, removing any soft spots, green stems, or leaves before rinsing them gently in a colander.
Step Two: Place your prepared apples, orange slices, lemon slices, and mixed berries into a very large heavy bottomed stockpot. Pour twelve cups of filtered clean water directly over the fruit until everything is nicely submerged. Place the stockpot over medium high heat on your stovetop and bring the water to a full rolling boil. Reduce the heat down to medium low, place a lid on the pot, and let the fruit simmer gently for about thirty minutes until the fruits become soft and release their rich juices.
Step Three: Place a fine mesh strainer over another large clean pot or large heatproof mixing bowl. Line the mesh strainer with two layers of clean cheesecloth or a large jelly bag to ensure your fruit punch turns out clear and smooth. Carefully ladle the hot cooked fruit mixture into the lined strainer. Allow the liquid to drip through naturally for about one hour without squeezing or pressing down on the soft fruit pulp, as pressing can make your final punch cloudy instead of beautifully clear.
Step Four: Once all the sweet liquid has filtered into the lower pot, discard or compost the leftover solid fruit pulp. Place the pot containing the strained fruit juice back onto your stovetop over medium heat. Stir in the granulated sugar and bottled lemon juice until the sugar crystals completely dissolve into the hot liquid. Bring the liquid to a gentle boil for about five minutes while stirring occasionally, tasting carefully to ensure the balance of sweet and sour suits your preference.
Step Five: Prepare your water bath canner by filling it halfway with water and placing it on your stove to heat up. Wash your canning jars, new flat lids, and screw bands in warm soapy water, then rinse them completely clean. Keep the glass jars hot in warm water so they will not crack when filled with hot fruit punch.
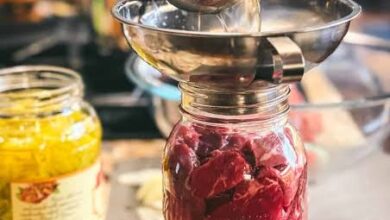
Step Six: Carefully pour the hot fruit punch into your hot clean jars using a canning funnel, leaving one half inch of empty space at the top of each jar. This empty space is very important because it allows the liquid to expand safely during processing. Wipe the glass rims of each jar with a clean damp paper towel to remove any sticky juice residue that could stop a seal from forming properly.
Step Seven: Place the flat metal lids on top of each jar and screw the outer bands down until they are fingertip tight. Use jar tongs to lower the filled jars carefully into the hot water bath canner, ensuring the water level covers the jar tops by at least one full inch. Place the cover on your canner and bring the water to a full boil over high heat.
Step Eight: Once the water reaches a continuous boiling state, start your processing timer for twenty minutes. Adjust your boiling time if you live at high elevation levels according to standard home canning guidelines. After the twenty minutes are completed, turn off the stovetop burner, remove the canner lid, and let the jars sit undisturbed in the water for five minutes.
Step Nine: Lift the jars carefully out of the water using your jar tongs and set them upright on a thick folded towel on your kitchen counter. Leave space between the jars so air can circulate freely around them. Allow the jars to cool completely at room temperature for twelve to twenty four hours without touching or moving them. As they cool, you will hear delightful pinging sounds as the lids seal tightly.
Step Ten: After twenty four hours, check each lid by pressing the center with your finger. If the lid stays flat and does not flex up and down, your jar is properly sealed. Remove the screw bands, wipe the outside of the glass jars clean, label them with the date, and store them in a cool dark pantry. Any jar that did not seal correctly should be stored in your refrigerator and consumed within one week.
Why This Recipe Is Special
This homemade fruit punch recipe stands out because it combines natural wholesome ingredients with easy home preservation methods. Unlike store bought options packed with synthetic flavors, artificial dyes, and chemical preservatives, this recipe relies entirely on pure whole fruits. The natural antioxidant properties from fresh berries and citrus fruits provide useful vitamins like Vitamin C to help support immune health and overall bodily wellness.
The combination of sweet apples, citrus fruits, and colorful berries creates a well balanced flavor profile that hits both sweet and tangy notes perfectly. Because you control the exact ingredients, you can easily adjust the sweetness or swap fruit varieties based on what is fresh and available in your local region. It offers a cleaner taste that feels light, uplifting, and genuinely refreshing for any meal or social gathering.
Extra Tips for Better Taste
To lift the overall flavor profile, try adding a small cinnamon stick or a few whole cloves to the pot while simmering the initial fruit mixture, taking them out before straining. This adds a warm subtle aromatic spice layer that works exceptionally well for autumn batch canning.
If you enjoy a bit of sparkle, do not drink the canned juice directly from the jar. Instead, pour one half jar of concentrated fruit punch over ice and top it off with cold plain sparkling mineral water or club soda. This creates a light fizzy mocktail that feels elegant and refreshing during summer afternoons.
For a tropical twist, you can replace part of the apple portion with fresh chopped pineapple or mango chunks. Just ensure you keep the added bottled lemon juice in the recipe to maintain proper safe acidity levels for water bath canning safety.
Final Thoughts
Preserving your own fruit punch at home is a fun and practical skill that brings pure joy to your daily kitchen routine. It fills your pantry with beautiful jars of colorful homemade juice that you can take pride in serving to family and friends. Give this recipe a try during your next fruit harvest, and enjoy the delicious taste of fresh fruit preserved with love and care all year long.
Nutrition Details
Recipe Yield: Makes approximately 6 pint jars (12 servings of 8 fluid ounces each)
Nutrition Per Serving (8 fluid ounces / 1 cup): Calories: 135 kcal Total Fat: 0 grams Saturated Fat: 0 grams Sodium: 5 milligrams Total Carbohydrates: 34 grams Dietary Fiber: 0 grams Total Sugars: 32 grams Added Sugars: 24 grams Protein: 0 grams Vitamin C: 25 percent Daily Value Calcium: 15 milligrams Potassium: 110 milligrams
Disclaimer
This recipe and nutritional information are provided for general educational and informational purposes only. Everyone has unique dietary requirements, health conditions, and nutritional needs, so individual experiences and results may vary. Always follow current tested food safety guidelines for home canning to ensure safe storage. If you have specific medical conditions, food allergies, or dietary restrictions, please consult with a qualified medical professional or certified nutritionist before making changes to your diet.