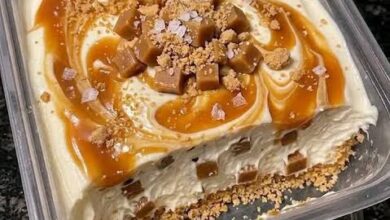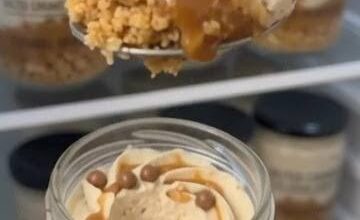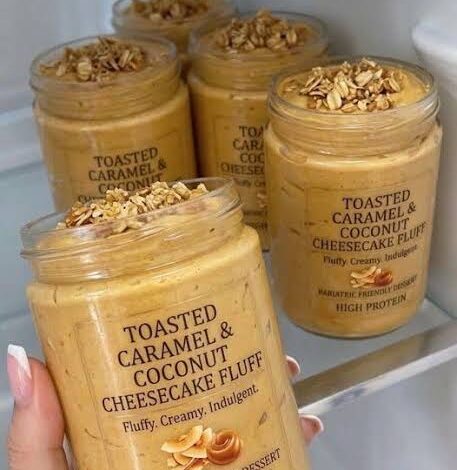
Imagine sitting in a cozy kitchen while the sweet aroma of golden tropical flakes fills the entire home. This toasted caramel and coconut cheesecake is a truly breathtaking dessert that brings together three incredible flavors into one magical slice. The foundation starts with a buttery crust made from crumbled graham crackers combined with fine shredded flakes. On top of this sturdy base sits a silky smooth cream cheese layer that feels light and rich at the exact same time. Rich homemade caramel is swirled into the batter and draped over the top, creating a beautiful golden appearance that catches the eye instantly. Every single forkful gives you a wonderful contrast between crisp crunchy bits and velvety soft cream. It is the ultimate sweet treat for anyone who appreciates warm tropical notes blended with deep buttery sugar goodness.
Food lovers around the world adore this dessert because it feels like a high end bakery treat that you can easily bake right in your own home. The combination of sweet gooey glaze and roasted coconut creates a comforting flavor profile that people simply cannot resist. Many conventional cakes can feel dry or overly sugary, but this particular creation balances rich fat, natural creaminess, and soft nutty textures perfectly. When you slice into the cool cake, the glossy topping slowly drips down the sides, making it look photo worthy without any fancy professional equipment. Friends and family members always ask for second helpings because every bite offers a completely new texture experience. It is a crowd pleaser that satisfies both sweet cravings and comforting dessert desires simultaneously.
There are so many wonderful reasons and special occasions to bake this memorable cheesecake for the people you love most. It serves as the perfect centerpiece for holiday dinners, weekend family gatherings, birthday parties, or cozy Sunday afternoon treats. Beyond special events, baking this recipe can be a deeply comforting emotional experience that helps you unwind after a long busy week. The simple act of stirring ingredients and watching the sugar turn into a golden syrup brings genuine joy to any home cook. Even if you are mindful of your daily food choices, enjoying a slice of a rich homemade dessert made with real whole ingredients fits wonderfully into a balanced lifestyle. Celebrating life with sweet moments nourishes the spirit and creates happy long lasting memories with your family and friends.
Beginning home bakers often feel intimidated by baking fancy cakes, but this clear tutorial breaks everything down into super easy steps. You do not need expensive commercial mixers or professional chef tools to achieve a smooth texture and balanced flavor. By taking your time to roast the ingredients carefully and letting the dairy come to room temperature, you guarantee perfect results on your very first try. The natural oils in the roasted flakes add a lovely fragrance while keeping the slice delightfully moist for days. Preparing this dish is a peaceful journey that fills your kitchen with happiness, warmth, and irresistible scents. Once you master this classic comfort dessert, it will surely become your absolute favorite signature dish to share with everyone.
Ingredients You Will Need
For the Biscuit Crust
-
2 cups graham cracker crumbs
-
1 cup finely shredded unsweetened coconut flakes
-
6 tablespoons unsalted butter, fully melted
-
2 tablespoons granulated white sugar
-
1 pinch of fine sea salt
For the Smooth Cream Cheese Filling
-
32 ounces full fat cream cheese, completely softened at room temperature
-
1 cup granulated white sugar
-
1 cup thick sour cream, at room temperature
-
1 teaspoon pure vanilla extract
-
1 teaspoon natural coconut extract
-
4 large whole eggs, at room temperature
-
1/2 cup sweet caramel sauce, divided for swirling
For the Toasted Coconut Topping and Caramel Drizzle
-
1.5 cups sweet shredded coconut flakes for roasting
-
3/4 cup warm rich caramel sauce for the final glaze
-
1/2 cup heavy whipping cream for extra creaminess
-
1 tablespoon sea salt flakes for optional garnish
Step by Step Method
Step 1: Toasting the Flakes
Place a large dry skillet over medium heat on your stove top. Dump the sweet shredded flakes into the warm pan. Stir continuously with a wooden spoon so the flakes do not burn. Watch the pan closely because the flakes will change color very quickly. Within three to five minutes, the flakes will turn a light golden brown color and release a delicious nutty aroma. Immediately transfer the hot flakes out of the skillet and onto a cool plate. Allow the toasted flakes to cool down completely before using them in the recipe.
Step 2: Preparing the Oven and Pan
Preheat your standard kitchen oven to 325 degrees Fahrenheit or 160 degrees Celsius. Take a nine inch springform baking pan and brush the inside bottom and sides lightly with softened butter. Line the very bottom with a round piece of parchment paper to ensure easy removal later. Wrap the exterior bottom of the springform pan tightly with two thick layers of heavy duty aluminum foil. This special foil wrapping prevents water from leaking into your pan during the gentle water bath baking process.
Step 3: Making the Crunchy Base
In a large mixing bowl, combine the graham cracker crumbs, half a cup of your cooled toasted flakes, white sugar, and sea salt. Stir these dry ingredients together using a spoon. Pour the melted unsalted butter over the crumb mixture. Mix everything thoroughly until the crumbs feel like moist beach sand. Dump the buttery crumb mixture into the prepared springform pan. Press the crumbs firmly into an even layer along the bottom using the flat bottom of a clean glass cup. Place the pan in the preheated oven and bake for ten minutes until light golden. Remove the crust and let it cool completely.
Step 4: Mixing the Creamy Filling
In a large clean bowl, beat the softened cream cheese using an electric mixer on low speed. Mix for about two minutes until the cheese looks completely smooth and lump free. Gradually add the white sugar while continuing to beat slowly. Add the room temperature sour cream, pure vanilla extract, and natural coconut extract. Scrape down the sides of the bowl with a rubber spatula so everything mixes evenly. Add the eggs one at a time, beating gently after each addition just until the yellow yolk disappears. Do not overmix the batter at this stage to prevent air bubbles.
Step 5: Assembling and Swirling
Pour half of the smooth cheesecake batter over the cooled baked crust in the springform pan. Drizzle one quarter cup of rich caramel sauce randomly over the top of this first layer. Use a butter knife or wooden toothpick to gently swirl the golden sauce into the white batter. Pour the remaining cream cheese batter gently over the swirled layer, smoothing the top with your spatula. Drizzle another quarter cup of caramel sauce over the top layer and swirl it gently once more to create a beautiful marbled pattern.
Step 6: Baking in a Water Bath
Place the foil wrapped springform pan inside a large deep roasting pan. Carefully pour boiling hot water into the outer roasting pan until the water level reaches halfway up the sides of the springform pan. Carefully transfer the entire roasting pan into your warm oven. Bake at 325 degrees Fahrenheit for approximately sixty to seventy minutes. The cheesecake is done when the outer edges are set and firm, but the very center still has a tiny gentle wobble when you tap the pan.
Step 7: Cooling and Chilling Properly
Turn off the oven and prop the oven door open slightly with a wooden spoon. Let the cake rest inside the warm oven for one full hour. This gradual cooling process stops the top from cracking. After one hour, remove the cake from the oven and carefully take it out of the water bath. Remove the foil wrap and place the pan on a wire cooling rack until it reaches room temperature. Cover the pan loosely with plastic wrap and place it in the refrigerator to chill for at least six hours, or preferably overnight.
Step 8: Adding Final Toppings and Serving
Once the cake is completely chilled and firm, run a thin knife around the inside edge of the pan. Gently release the outer latch and remove the springform ring. Transfer the cake onto a pretty serving platter. Warm your remaining caramel sauce slightly until it pours easily. Drizzle the warm caramel generously over the top of the chilled cake. Pile the remaining toasted flakes high in the center or cover the entire top evenly. Add a slight pinch of sea salt flakes over the caramel if you like sweet and salty flavors. Slice with a sharp warm knife and serve immediately.
Why This Recipe Is Special
This particular dessert stands out because it combines incredible texture with complex tropical flavors in every single bite. The blend of rich dairy cream and warm roasted coconut creates an extraordinary taste experience that feels modern and classic at the exact same time. Baking the cake inside a gentle warm water bath ensures that the interior remains unbelievably smooth without drying out or cracking open on top. It gives you that luxurious texture normally found only in high end pastry shops.
From a lifestyle perspective, making your own treats from scratch gives you full control over every ingredient you use. Unlike commercial store bought options, this homemade recipe contains zero artificial preservatives, fake food colors, or chemical stabilizing agents. Coconut provides healthy plant lipids and natural minerals like manganese, which supports general vitality. Additionally, dark rich caramel brings pure simple comfort that boosts your mood and brings genuine happiness during family dessert time.
Extra Tips for Better Taste
To elevate this dessert even further, consider using high quality pure vanilla bean paste instead of basic liquid vanilla extract. The tiny black vanilla seeds create an elegant visual appearance and provide a much deeper floral fragrance. You can also roast your flakes with a tiny teaspoon of maple syrup or honey in the pan for an extra layer of warm sweetness and a deeper mahogany color.
Another wonderful creative idea is to add a thin layer of melted dark chocolate directly over the baked crust before adding the cream cheese batter. Dark chocolate pairs amazingly well with tropical coconut and golden caramel, creating a flavor combination similar to famous candy bars. Always slice your chilled cake using a clean knife dipped in warm tap water and wiped dry between every single cut. This simple trick yields clean restaurant quality slices every single time.
Final Thoughts
Baking a magnificent dessert at home does not have to be stressful or complicated at all. This simple toasted caramel and coconut cheesecake brings huge rewards for a small amount of patient effort in the kitchen. The warm tropical scents and silky textures are guaranteed to bring bright smiles to everyone sitting around your dining table. Gather your basic ingredients, follow these step by step directions carefully, and enjoy every sweet moment of creating this fantastic treat for your loved ones today.
Nutrition Details
Below you will find the estimated nutritional values for this complete recipe as well as the average breakdown for an individual slice.
Complete Recipe Overview Table
| Nutritional Component | Total Amount in Whole Cake |
| Servings Per Recipe | 12 slices |
| Total Caloric Value | 6240 kilocalories |
| Total Fat Content | 432 grams |
| Total Saturated Fat | 264 grams |
| Total Cholesterol | 1480 milligrams |
| Total Sodium | 3120 milligrams |
| Total Carbohydrates | 528 grams |
| Dietary Fiber | 24 grams |
| Total Sugars | 396 grams |
| Protein Content | 84 grams |
Per Serving Nutrition Table
| Nutritional Component | Value Per Single Slice |
| Serving Size | 1 slice (1/12th of cake) |
| Calories | 520 kilocalories |
| Total Fat | 36 grams |
| Saturated Fat | 22 grams |
| Cholesterol | 123 milligrams |
| Sodium | 260 milligrams |
| Total Carbohydrates | 44 grams |
| Dietary Fiber | 2 grams |
| Sugars | 33 grams |
| Protein | 7 grams |
| Calcium | 110 milligrams |
| Iron | 1.8 milligrams |
Disclaimer
Please note that all nutritional values provided in this article are simple estimates calculated using standard ingredient databases. Actual nutritional numbers may vary based on specific brand choices, measurement variations, or preparation methods used in your personal kitchen. Everyone has unique dietary requirements, energy needs, and personal health goals. If you have specific health conditions, dietary restrictions, or nutritional concerns, please consult a qualified healthcare professional or registered dietitian for personalized advice.