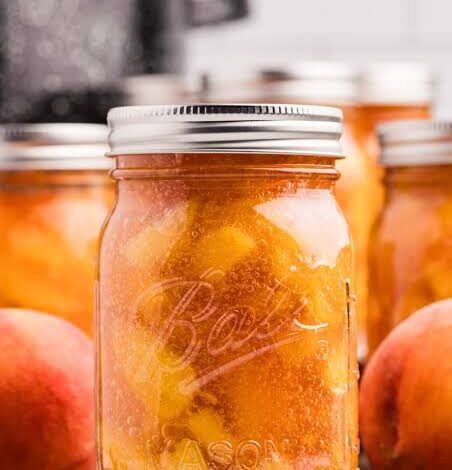
Canning homemade peach pie filling at home is one of the most rewarding kitchen projects you can start this season. Imagine opening a clear glass jar in the middle of a cold winter day and seeing bright yellow peaches soaking in a thick syrup that smells like summer sunshine. This traditional process allows you to capture the natural sweetness and juicy softness of fresh peaches when they are at their peak freshness. By preserving your own batch, you ensure that your family enjoys natural fruit without artificial colors or harsh chemical additives found in store products. Bringing fresh orchard fruit into your kitchen creates a wonderful aroma that fills every room with cozy warmth. Many home cooks discover that preparing fruit spreads and pie bases gives them full control over their ingredients, sugar levels, and final flavor balance. Once you learn this simple technique, you can easily preserve dozens of pounds of fresh summer peaches every single year.
People across the world love this canned fruit recipe because it saves a massive amount of time when baking emergency desserts for unexpected guests. When you have a few jars sitting on your pantry shelf, making a warm peach pie becomes as simple as rolling out a pie crust and pouring the prepared filling straight inside. Kids and adults love the rich texture of thick syrup combined with soft fruit slices that melt in your mouth with every bite. The sweet glaze coats the fruit evenly so every forkful delivers an amazing taste that tastes much better than anything sold in metal cans at the local grocery store. It is also a very budget friendly project because buying fresh peaches in large quantities during peak harvest season costs very little money. Friends and family members always appreciate receiving a beautiful jar of homemade fruit filling as a thoughtful holiday gift or neighborhood present.
There are so many wonderful reasons to make this recipe, whether you are thinking about family traditions, comforting food cravings, or healthy home cooking habits. Eating warm peach pie with a scoop of vanilla ice cream brings back happy memories of summer picnics, family reunions, and sunny afternoon gatherings. From a wellness perspective, peaches contain helpful dietary fiber, natural fruit sugars, essential vitamin C, and healthy antioxidants that support your overall body. Preparing your own jarred fruit lets you customize the total sweetness by choosing lower amounts of sugar or using healthier spice combinations like ground cinnamon and nutmeg. It is also an amazingly fun activity to do with your children or partners over a weekend afternoon, turning fresh fruit prep into a memorable household event. Knowing that your pantry is stocked with clean food prepared by your own hands brings a deep sense of satisfaction and peace of mind.
Starting this preservation journey will transform how you plan your weekly family meals, weekend breakfasts, and special holiday dessert menus. You do not need to limit this sweet preserved fruit to baked pie crusts alone, as it works amazingly well over morning oatmeal, fluffy pancakes, crunchy waffles, and plain Greek yogurt. Having prepped jars ready in your pantry means you can elevate a simple weekday breakfast into a bakery quality meal within just a few quick seconds. The natural flavor of fresh fruit stays locked inside the sealed glass container for many months without losing its bright color or pleasant fragrance. As you become comfortable with the basic steps, you will feel more confident trying other fruit preservation recipes and sharing your success with fellow baking enthusiasts. This easy method is designed specifically for beginners who want smooth results without complicated tools or confusing cooking terms.
Ingredients You Will Need
To prepare a large batch of six quart jars of delicious preserved peach pie filling, gather these exact ingredients in your kitchen:
-
Fresh ripe peaches: 6 quarts or about 12 pounds of firm fresh peaches
-
Granulated white sugar: 6 cups of clean white sugar
-
Clear Jel thickener: 1 and 1 half cups of cook type Clear Jel powder
-
Cold water: 2 and 1 half cups of pure cold water
-
Unsweetened apple juice: 1 and 3 fourths cups of natural apple juice
-
Bottled lemon juice: 3 fourths of a cup of commercial bottled lemon juice
-
Ground cinnamon: 1 teaspoon of rich ground cinnamon
-
Ground nutmeg: 1 half teaspoon of aromatic ground nutmeg
-
Almond extract: 1 teaspoon of pure almond extract
Step by Step Method
-
Prepare your water bath preserver pot by filling it halfway with clean water and putting it on the stove over medium heat so it stays hot and ready for processing.
-
Wash all six glass quart jars thoroughly using hot water and liquid dish soap, then rinse them completely so no soap bubbles remain inside.
-
Place the clean jars into your hot water pot to keep them warm, which prevents the glass from breaking when hot fruit mixture is poured inside later.
-
Fill a large cooking pot with fresh water and bring it to a rolling boil on your stove burner.
-
Prepare a large washing bowl right next to the stove filled with cold water and clean ice cubes.
-
Take your fresh peaches and cut a small cross shape into the bottom skin of each fruit using a small sharp paring knife.
-
Drop a few peaches at a time into the boiling water for exactly one minute until the outer skin starts to loosen up.
-
Remove the hot peaches using a slotted spoon and dunk them immediately into the ice water bowl to stop the cooking process.
-
Slip the skin off each peach using your fingers, then cut the fruit in half to remove the hard inner pit safely.
-
Slice the peeled peaches into thick even slices so they hold their shape nicely during hot water processing.
-
Keep the sliced peaches in a bowl filled with cold water mixed with a little lemon juice so the light fruit color does not turn brown.
-
Bring a fresh pot of water to a boil and cook the peach slices for one minute, then drain them and keep them warm in a covered bowl.
-
In a large heavy stainless steel pot, combine the white sugar, Clear Jel powder, ground cinnamon, and ground nutmeg using a dry wire whisk.
-
Pour the cold water and natural apple juice into the dry sugar mixture, whisking constantly to keep the powder from forming small clumps.
-
Set the pot over medium high heat and stir the mixture constantly until it begins to thicken up and form large rising bubbles.
-
Add the bottled lemon juice to the thick boiling liquid and continue stirring continuously for one full minute to ensure complete mixing.
-
Remove the thick sauce from the heat burner and gently stir in the pure almond extract for a warm aromatic smell.
-
Fold the warm drained peach slices gently into the hot thick sauce using a large rubber spatula until all fruit pieces are coated evenly.
-
Carefully pull one warm glass jar out of your hot water pot and place it onto a clean wooden cutting board or thick cloth towel.
-
Place a wide funnel over the jar opening and ladle the hot fruit filling mixture into the jar, leaving exactly one inch of empty space at the top.
-
Insert a long plastic bubble remover tool or wooden skewer inside the jar to release all trapped air bubbles from the bottom and sides.
-
Adjust the filling level if needed so that the top empty space remains exactly one inch from the top rim of the glass jar.
-
Wipe the top rim of the glass jar clean using a fresh paper towel dampened with warm water to remove any sticky sugar residue.
-
Place a flat metal canning lid centered on top of the clean jar rim and screw a metal band down until it feels fingertip tight.
-
Repeat the filling and wiping steps for all remaining warm glass jars until your entire fruit batch is packed safely.
-
Use a sturdy jar lifter tool to place all filled glass jars vertically into the hot water preserver pot, ensuring the water level covers the jar caps by two inches.
-
Place the heavy lid onto the preserver pot and bring the water to a full rolling boil over high heat.
-
Process the quart jars in the boiling water bath for thirty minutes, adjusting your timer if you live at high mountain altitudes.
-
Turn off the stove burner after thirty minutes, remove the pot lid, and let the jars sit undisturbed in the hot water for five full minutes.
-
Use your jar lifter to lift the hot jars straight up out of the water and place them onto a thick dry towel spread across your kitchen counter.
-
Allow the hot jars to cool completely at room temperature for twenty four hours without moving them or touching the metal caps.
-
Listen for the satisfying popping sound of the metal lids pulling downward, which signals that a tight airtight seal has been formed.
-
Test each cooled jar lid by pressing the center with your finger to ensure it does not flex up or down.
-
Remove the screw bands, clean the outside of the glass jars with a damp cloth, label them with the preparation date, and store them in a cool dark pantry.
Why This Recipe Is Special
This homemade pie filling stands out from ordinary jam recipes because it maintains the real bite and fresh texture of tree ripened fruit. Using specialized Clear Jel powder ensures that the thick sauce remains smooth, clear, and stable during heat processing without breaking down into runny liquid. The addition of subtle spices like cinnamon and nutmeg brings out the deep natural sugars of the peaches without overwhelming their light fruity flavor. Because you choose your own ingredients, you avoid high fructose corn syrup, artificial yellow dyes, and synthetic chemical preservatives found in commercial baking cans. Fresh peaches deliver useful plant compounds, natural dietary fiber, and important vitamins that support your daily energy levels and digestion. Baking with your own canned creation gives you immense personal pride and produces baked goods that taste far superior to quick store alternatives.
Extra Tips For Better Taste
Choosing the right type of fruit is the secret key to producing the best tasting jars for your home pantry collection. Look for firm freestone peach varieties because their inner pits separate easily from the sweet yellow flesh without wasting good fruit. You can substitute half of the cold water with pure white grape juice or light peach nectar to add an extra layer of natural fruit flavor to your thick sauce base. Adding a tiny drop of pure vanilla bean paste alongside the almond extract creates a rich creaminess that tastes like classic peach cobbler. Always use commercial bottled lemon juice instead of fresh squeezed lemons because bottled juice guarantees the exact level of safe acidity required for home water processing. If you prefer a lighter spice profile, you can omit the ground nutmeg and double the amount of ground cinnamon to keep the focus purely on simple orchard flavors. Never use traditional cornstarch or flour for this water bath process because those standard thickeners can cause safety issues inside sealed glass jars over long periods.
Final Thoughts
Taking the time to preserve your own sweet peach pie filling is a wonderful gift to your future self that pays off every time you open your pantry door. The bright golden color and fresh fruit aroma inside each jar will bring warmth and happiness to your home during cold rainy days and busy holiday seasons. Sharing these homemade fruit creations with your friends, neighbors, and family members creates sweet connections and starts lovely traditions around your dining table. With a little patience, clean tools, and fresh orchard ingredients, anyone can master this simple preservation process on their very first attempt. Gather your pots, pick up some fresh peaches from your local market, and enjoy every step of making this classic comfort food from scratch.
Nutrition Details
Here is the estimated nutritional breakdown for one single serving of this delicious homemade fruit pie filling:
| Nutrient Component | Value Per Serving | Value Per Full Jar |
| Serving Size | 1 cup or 250 grams | 4 cups or 1000 grams |
| Total Calories | 210 kcal | 840 kcal |
| Total Carbohydrates | 52 grams | 208 grams |
| Dietary Fiber | 3 grams | 12 grams |
| Total Sugars | 46 grams | 184 grams |
| Total Protein | 1 gram | 4 grams |
| Total Fat | 0 grams | 0 grams |
| Sodium | 10 milligrams | 40 milligrams |
| Potassium | 260 milligrams | 1040 milligrams |
| Vitamin C | 12 milligrams | 48 milligrams |
Disclaimer
This recipe and nutritional information are provided for general educational and home cooking guidance only. Individual dietary needs, metabolic health, and nutritional requirements vary from person to person based on age, activity level, and medical conditions. Always follow current food preservation guidelines to ensure your home canning projects remain safe for consumption over long storage periods. If you have specific dietary restrictions, health concerns, or food allergies, consult with a qualified doctor or certified nutritionist before adding new preserved foods to your regular daily meal plan.