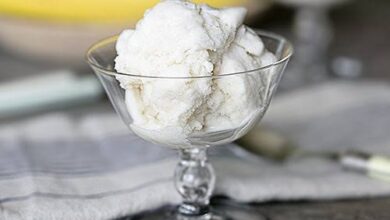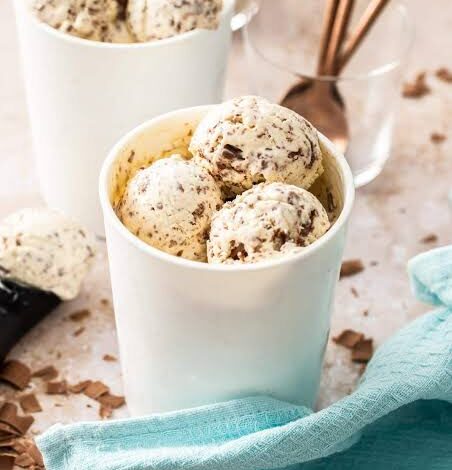
Welcome to the wonderful world of homemade frozen treats where making creamy and delicious dessert does not require any fancy kitchen gadgets. This specific recipe is all about creating a rich and decadent chocolate chunk ice cream right inside your regular home freezer without using an old fashioned churning machine. You are going to use very basic baking items that you probably already keep in your kitchen pantry or refrigerator. The magic behind this method relies on whipping heavy cream until it forms soft and fluffy peaks and then gently folding it together with sweetened condensed milk. This clever combination creates a velvety smooth base that freezes into a gorgeous treat without developing those hard icy crystals that usually ruin homemade ice cream. Whenever you crave a cold and sweet reward on a hot afternoon this fantastic dessert comes to your rescue in the easiest way possible.
People completely fall in love with this recipe because it saves a tremendous amount of time and effort while delivering bakery quality results right at home. You do not have to worry about pre freezing heavy bowls or waiting hours for a bulky machine to spin your custard mixture. Within just fifteen minutes of active prep time your dessert is ready to go straight into the freezer to set properly. The taste is incredibly rich with deep cocoa flavors and wonderful pockets of solid chocolate scattered throughout every single spoonful. It feels like an expensive gourmet scoop from an ice cream parlor but costs a fraction of the price and brings immense satisfaction because you made it completely by your own hands. Plus you can proudly share this amazing treat with your family and friends who will be amazed that you pulled it off without any special equipment.
You should make this gorgeous chocolate dessert whenever you want to celebrate a special milestone or simply turn an ordinary weeknight into a memorable occasion. It is the ultimate comfort food when you feel stressed out and need a massive dose of sweet chocolate therapy to lift your mood instantly. From a taste perspective it hits every single craving spot by offering a cool and creamy texture paired with satisfying crunch from the chocolate chunks. If you are watching your fitness journey you can still enjoy a small controlled portion as a wonderful weekend reward because treating yourself mindfully is a key part of a balanced lifestyle. Children and adults alike will crowd around the kitchen counter the moment you pull this tub out of the freezer making it a fantastic bonding activity for birthdays or movie nights.
Bringing this wonderful recipe to life is also a fantastic way to impress unexpected guests who drop by your house on a warm summer afternoon. You do not need to stress about baking complicated cakes or spending hours over a hot stove because this dessert takes care of itself while chilling quietly in the back of your freezer. The simple joy of scooping out generous portions into colorful bowls creates an atmosphere of pure happiness and relaxation for everyone involved. As you take your very first bite you will immediately notice how the chocolate pieces melt gently against the creamy background creating a symphony of delightful flavors in your mouth. Dive right into this fun culinary project today and discover how wonderfully simple it is to become a master of homemade frozen desserts.
Ingredients You Will Need
-
Heavy whipping cream: Two cups (well chilled)
-
Sweetened condensed milk: One can (fourteen ounces)
-
Unsweetened cocoa powder: Half a cup (sifted to remove lumps)
-
Vanilla extract: Two teaspoons
-
Salt: A tiny pinch (to enhance the chocolate flavor)
-
Dark or milk chocolate chunks: One cup (coarsely chopped)
Step by Step Method
Getting started on your homemade chocolate chunk ice cream adventure is an absolute joy because the steps are straightforward and designed for absolute beginners. First you want to take out a large mixing bowl and place it inside your refrigerator for about ten to fifteen hours so it gets nice and cold. A cold bowl helps your heavy whipping cream whip up much faster and holds its fluffy volume much better.
Next grab your chilled heavy whipping cream and pour it directly into your cold mixing bowl. Take your electric hand mixer or your stand mixer fitted with the whisk attachment and begin beating the cream on medium speed. Watch the cream closely as tiny bubbles form and slowly transform into soft peaks. Keep beating until the cream holds its shape firmly when you lift the beaters straight up into the air. Be very careful not to overbeat the cream into butter because you want it to remain light and airy like a cloud.
In a separate medium sized bowl pour your entire can of sweetened condensed milk. Add the sifted unsweetened cocoa powder along with your two teaspoons of vanilla extract and that tiny pinch of salt. Take a wire whisk or a spatula and stir everything together vigorously until the cocoa powder is completely dissolved and the mixture turns into a smooth and glossy chocolate syrup. Make sure there are no dry pockets of cocoa powder hiding at the bottom of the bowl.
Now comes the most important technique of the entire recipe which is folding. Take about one third of your freshly whipped heavy cream and add it directly into your chocolate condensed milk mixture. Gently stir this first portion in to lighten up the heavy chocolate base. Next pour the remaining whipped cream into the bowl. Take a rubber spatula and use gentle sweeping motions going down the middle of the bowl and up around the sides. This folding action ensures you do not pop all those wonderful air bubbles you worked hard to create in the whipped cream. Continue folding until the mixture is uniform and has a gorgeous light chocolate color.
Take your freshly chopped dark or milk chocolate chunks and scatter them all over the surface of your creamy chocolate mixture. Gently fold the chocolate pieces into the base so they are evenly distributed throughout the entire bowl. Every single scoop you dish out later will be packed with lovely surprises of solid chocolate.
Transfer your finished ice cream mixture into a loaf pan or any freezer safe container with a tight fitting lid. Smooth out the top surface nicely with your spatula. To prevent ice crystals from forming on top press a piece of plastic wrap directly onto the surface of the ice cream before sealing the lid tightly.
Place your container flat on a shelf in your freezer and let it freeze undisturbed for at least six hours or preferably overnight. Once the time has passed pull the container out of the freezer remove the plastic wrap and grab your ice cream scoop. Dip your scoop in warm water first to help it glide smoothly through the frozen dessert and serve it up in your favorite bowls or waffle cones immediately.
Why This Recipe Is Special
This particular recipe stands out from store bought alternatives because it contains zero artificial preservatives or strange chemical stabilizers that you cannot pronounce. You get to control every single ingredient that goes into your body making it a wholesome and transparent treat for you and your family. The rich cocoa flavor combined with the high quality dairy brings a level of satisfaction that commercial brands simply cannot match. Financially speaking making this dessert at home saves you a lot of money over time while providing double the amount of delicious ice cream compared to tiny luxury pints at the grocery store. From a taste perspective the balance between the sweet cream base and the slightly bitter chocolate chunks creates a gourmet flavor profile that feels upscale and deeply comforting.
Extra Tips for Better Taste
To elevate your homemade ice cream to absolute perfection you can experiment with a few creative additions and techniques. If you love texture try toasting your chocolate chunks lightly in a dry pan for a minute before folding them in to add a subtle smoky depth. You can also swap regular vanilla extract for peppermint extract if you adore the classic combination of mint and chocolate. For an extra luxurious finish drizzle a spoonful of homemade caramel sauce or hot fudge over your scoops right before serving them to your guests. Always make sure your heavy cream is as cold as possible straight from the fridge before you start whipping because temperature plays the biggest role in achieving that fluffy texture.
Final Thoughts
Creating wonderful memories in the kitchen does not require professional culinary training or expensive equipment. This delightful no churn chocolate chunk ice cream proves that with a handful of basic ingredients and a little bit of love you can whip up magic right on your own kitchen counter. Share this sweet masterpiece with the people you cherish most and enjoy the endless smiles and compliments that will surely come your way. Happy cooking and enjoy every single delicious bite of your homemade frozen masterpiece.
Nutrition Details
| Nutrient | Per Serving | Daily Value Percentage |
| Calories | 310 kcal | 15 percent |
| Total Fat | 18 grams | 28 percent |
| Saturated Fat | 10 grams | 50 percent |
| Cholesterol | 45 milligrams | 15 percent |
| Sodium | 95 milligrams | 4 percent |
| Total Carbohydrates | 34 grams | 11 percent |
| Dietary Fiber | 2 grams | 8 percent |
| Sugars | 30 grams | Not established |
| Protein | 5 grams | 10 percent |
Disclaimer
The nutritional information and health details provided in this article are estimated values calculated for general guidance purposes only. Every single human body is entirely unique with different metabolic rates daily activity levels and dietary requirements. Therefore the actual nutritional results and calorie counts for your specific finished dessert may vary based on the exact brands and measurements of the ingredients you choose to use in your kitchen.