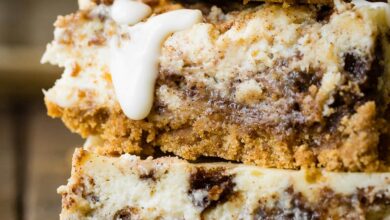
Everyone has a favorite food memory that takes them back to a warm kitchen on a cold afternoon. For many of us, that memory is the sweet smell of a fresh apple pie baking in the oven. This recipe is all about making the ultimate tasty apple pie from scratch without any of the stress or confusion that usually comes with baking. We are going to walk you through the entire process of creating a golden, flaky crust and a rich, spiced fruit filling that tastes like a slice of heaven. You do not need to be a professional chef or have expensive kitchen gadgets to make this dessert look and taste absolutely amazing. By using simple ingredients that you probably already have in your pantry, you can create a masterpiece that will make everyone think you spent all day working away in a fancy bakery.
People absolutely love this particular recipe because it strikes the perfect balance between sweet and tart flavors while keeping the texture incredibly satisfying. There is something truly magical about the contrast between the buttery, crispy layers of the crust and the soft, juicy spiced apples hiding inside. Many modern recipes use too much sugar or strange thickeners that ruin the natural goodness of the fruit, but this version lets the fresh apples shine as the true stars of the show. It is a comforting dessert that brings people together, reminds us of family traditions, and satisfies our sweet tooth in a wholesome way. Plus, the crust is so flaky and delicious that you will never want to buy a pre-made, store-bought pie crust ever again in your life.
This is the perfect recipe to make whenever you want to bring a little bit of extra warmth and joy into your home or share a special moment with your loved ones. You can bake this wonderful pie for autumn holidays, family Sunday dinners, neighborhood potlucks, or just because you have a bag of fresh apples sitting on your kitchen counter. Baking is also a wonderful way to relieve stress and practice mindfulness because it forces you to slow down, measure carefully, and enjoy the physical process of working with your hands. On top of that, making your own treats at home is a great fitness and health choice because you get to control every single ingredient that goes into your body. You can skip the artificial preservatives, bad fats, and chemical additives found in commercial pies and instead enjoy a clean, homemade dessert that fits into a balanced lifestyle.
There is nothing quite like the feeling of pride you get when you pull a beautifully golden, bubbling pie out of the kitchen oven and present it to your eager guests. The sound of that first slice being cut, the steam rising up with the scent of cinnamon, and the smiles on everyone’s faces are worth every single minute of effort. This recipe is designed to be completely foolproof so that even absolute beginners can achieve perfect results on their very first attempt. We will guide you through making the dough, preparing the apple mixture, assembling the layers, and baking everything to golden perfection. Grab your apron, clear off your kitchen counter, and let us get ready to make the most delicious homemade apple pie you have ever tasted.
Ingredients You Will Need
To make this delicious pie, you will need to gather a few simple ingredients for both the pastry crust and the sweet apple filling. Please make sure your cold ingredients are very cold, as this is the secret to getting a super flaky crust.
For the Perfect Pie Crust
-
3 cups of all purpose flour
-
1 cup of unsalted butter, cut into small cubes and chilled in the fridge
-
1 teaspoon of fine salt
-
1 tablespoon of white granulated sugar
-
8 tablespoons of ice cold water, plus a little extra if needed
For the Sweet Apple Filling
-
6 large apples, a mix of sweet and tart varieties like Granny Smith and Honeycrisp
-
1 tablespoon of fresh lemon juice
-
1 half cup of white granulated sugar
-
1 half cup of light brown sugar, packed down in the cup
-
1 teaspoon of ground cinnamon
-
1 quarter teaspoon of ground nutmeg
-
2 tablespoons of all purpose flour, to thicken the juices
-
1 tablespoon of unsalted butter, cut into tiny pieces to dot on top of the filling
-
1 large egg, beaten with 1 tablespoon of water for the egg wash
-
1 tablespoon of coarse sugar, for sprinkling on top of the crust
Step by Step Method
Making the Pastry Crust
First, we need to prepare our dough because it needs time to rest and get cold in the refrigerator. In a large mixing bowl, whisk together the three cups of all purpose flour, the fine salt, and the tablespoon of white granulated sugar until they are well combined.
Next, add your cold, cubed unsalted butter directly into the flour mixture. Using your clean fingertips or a pastry blender, gently work the butter into the flour. You want to press and rub the butter pieces into the flour until the mixture looks like coarse crumbs with some pea sized chunks of butter still visible. These small chunks of butter are what create the flaky layers when the pie bakes.
Slowly drizzle in the ice cold water, starting with about six tablespoons. Use a spatula or your hands to gently toss the flour and water together. If the dough still feels dry and dusty, add the remaining two tablespoons of cold water one tablespoon at a time. Gently press the dough together until it just starts to hold its shape. Do not overwork or knead the dough, as this will make your crust tough instead of flaky.
Divide the dough into two equal portions. Shape each portion into a smooth, flat round disc. Wrap each disc tightly in plastic wrap and place them in your refrigerator to chill for at least one hour. This resting time lets the gluten in the flour relax and makes the butter solid again.
Preparing the Sweet Apple Filling
While your dough is chilling in the refrigerator, you can start preparing the fresh apple filling. Begin by washing, peeling, and coring all six of your large apples. Slice the apples into thin wedges, about one quarter of an inch thick. Try to make the slices even in size so that they cook at the same rate in the oven.
Place all your sliced apples into a large mixing bowl and immediately drizzle them with the fresh lemon juice. Toss the apples gently to coat them, as the lemon juice will stop them from turning brown and will also add a nice bright flavor.
In a separate small bowl, stir together the white granulated sugar, the packed light brown sugar, the ground cinnamon, the ground nutmeg, and the two tablespoons of flour.
Pour this sweet spice mixture over the apples and use a large spoon to stir everything together. Make sure every single apple slice is well coated in the sugars and spices. Let this mixture sit on your counter for about twenty minutes so the apples can release some of their natural juices and absorb the delicious spice flavors.
Assembling the Pie
When your dough has finished chilling and your apples are ready, retrieve one disc of dough from the refrigerator. Lightly dust your clean kitchen counter and your rolling pin with a little bit of flour.
Using your rolling pin, gently roll the dough disc out from the center to the edges, rotating it occasionally to make sure it does not stick to the counter. Roll it out until you have a circle that is about twelve inches wide and about one eighth of an inch thick.
Carefully lift the rolled dough and place it into your nine inch pie dish, letting it drape gently into the bottom and sides without stretching it. If the dough tears a little bit, do not worry at all. You can easily patch it up by pressing a small scrap of dough over the tear.
Pour your spiced apple filling, along with all the delicious juices at the bottom of the bowl, into the pastry lined pie dish. Gently press down on the apples to make sure they are packed tightly and there are no large empty air pockets. Dot the top of the apples with the tiny pieces of the remaining tablespoon of unsalted butter.
Now, take the second disc of dough out of the refrigerator and roll it out on your floured counter just like you did with the first one. Carefully lift this second circle of dough and place it directly over the top of your apple filling.
Using a pair of clean kitchen scissors, trim the excess dough from both the top and bottom crusts so that there is only about a half inch of overhang around the edge of the pie dish. Fold the overhanging dough under itself along the rim of the dish to seal the juices inside.
To create a beautiful edge, you can use your fingers to pinch and flute the dough, or you can simply press the edges down with the prongs of a fork.
Using a sharp knife, cut four or five small slits in the center of the top crust. These slits act as vents to let the steam escape while the pie bakes, which keeps your crust from getting soggy.
Finally, brush the entire top crust lightly with your prepared egg wash. This will give your baked pie a gorgeous, shiny golden color. Sprinkle the tablespoon of coarse sugar evenly over the egg wash for a sweet and crunchy texture.
Baking the Masterpiece
Preheat your oven to 425 degrees Fahrenheit. While the oven is heating up, place your assembled pie back in the refrigerator for about fifteen minutes. This final chill helps the butter in the crust firm up again, which ensures the pie keeps its shape and gets extra flaky.
Place the cold pie on a large baking sheet lined with parchment paper. This baking sheet will catch any sweet juices that bubble over the edges during baking and will keep your oven clean.
Bake the pie at 425 degrees Fahrenheit for twenty minutes. This initial high heat starts the steam action in the crust, which makes it rise and become super flaky.
After twenty minutes, lower the oven temperature to 375 degrees Fahrenheit. Continue to bake the pie for another forty to fifty minutes. You will know your pie is completely done when the crust is a deep golden brown color and you can see the thick, sweet apple juices bubbling up through the steam vents in the center.
If you notice that the edges of your pie crust are getting too dark or brown during the baking process, you can easily cover the edges with some aluminum foil or a pie shield to protect them while the center finishes cooking.
Once the pie is fully baked, carefully remove it from the oven and place it on a wire cooling rack. It is absolutely essential to let the pie cool for at least two to three hours before you attempt to slice it. As the pie cools, the natural starches and juices inside will thicken up, allowing you to cut beautiful, clean slices. Serving the pie too hot will result in a runny filling, although it will still taste incredible.
Why This Recipe Is Special
This apple pie recipe is truly special because it combines traditional baking methods with simple, wholesome ingredients to create a dessert that feels like home. Unlike many store bought options that are packed with artificial flavorings, high fructose corn syrup, and hydrogenated oils, this pie uses real cream butter, fresh apples, and warm ground spices. By baking from scratch, you get to control the quality of what you eat, which is a major benefit for your body and your peace of mind.
Apples are naturally rich in dietary fiber, especially a type of soluble fiber called pectin, which helps support healthy digestion and keeps you feeling full. They also contain vitamin C and various antioxidants that help protect your cells and support your immune system. By combining them with spices like cinnamon, which is known for its natural anti inflammatory properties and ability to help regulate blood sugar, you are creating a treat that offers genuine nutritional value alongside its wonderful flavor.
The texture of this pie is another reason why it stands out from the rest. The method of keeping the butter cold and not overworking the dough creates hundreds of microscopic layers of pastry that puff up beautifully in the hot oven. When you bite into a slice, you get a crunch from the golden top crust, followed by the soft, melt in your mouth texture of the perfectly baked apples. It is a satisfying sensory experience that simply cannot be matched by processed desserts.
Extra Tips for Better Taste
-
Mix Your Apples: For the very best flavor profile, always use a combination of different apple varieties. Mixing tart Granny Smith apples with sweet Honeycrisp or Fuji apples creates a complex and balanced taste that is neither too sour nor too sweet.
-
Keep Everything Cold: We cannot stress this enough. If your butter starts to melt while you are making the dough, put the bowl in the freezer for five minutes. Cold butter is the absolute key to a flaky crust.
-
Add a Pinch of Salt to the Apples: A tiny pinch of salt added to your apple filling will actually enhance the sweetness of the sugar and bring out the deep, rich flavors of the cinnamon and nutmeg.
-
Try Warm Spices: If you want to experiment, you can add a small pinch of ground ginger, ground cloves, or even cardamom to your apple mixture for a unique, warm, and comforting spice blend.
-
Brush with Milk if No Eggs: If you do not want to use an egg wash, you can brush the top crust with a tablespoon of heavy cream or whole milk before baking to help it brown.
-
Let It Rest: Always resist the temptation to cut into the pie immediately. Letting it cool completely allows the juices to set, giving you perfect slices that hold their shape on the plate.
Final Thoughts
Baking a homemade apple pie is one of the most rewarding kitchen projects you can undertake. It fills your home with an aroma that makes everyone feel safe, warm, and loved. This recipe proves that you do not need complicated techniques or strange ingredients to create something truly magical. With a little bit of patience, some cold butter, and a few fresh apples, you can bake a dessert that will be remembered for years to come. Share a slice with your family, enjoy it with a scoop of vanilla ice cream, and celebrate the simple joy of baking from scratch.
Nutrition Details
Here is an estimated nutrition breakdown for one serving of this delicious homemade apple pie. This recipe serves approximately eight people.
| Nutrient | Amount Per Serving | Daily Value Percentage |
| Calories | 420 calories | 21 percent |
| Total Fat | 22 grams | 28 percent |
| Saturated Fat | 14 grams | 70 percent |
| Cholesterol | 55 milligrams | 18 percent |
| Sodium | 310 milligrams | 13 percent |
| Total Carbohydrates | 54 grams | 20 percent |
| Dietary Fiber | 4 grams | 14 percent |
| Sugars | 26 grams | Not Established |
| Protein | 4 grams | 8 percent |
| Vitamin C | 5 milligrams | 6 percent |
| Calcium | 20 milligrams | 2 percent |
| Iron | 2 milligrams | 11 percent |
Disclaimer
Please keep in mind that everyone’s body is completely different, and individual nutritional needs and health results may change based on your personal lifestyle, fitness level, and metabolism. The nutritional information provided in this article is an estimate calculated using standard ingredient databases and should be used as a general guide only. If you have specific dietary restrictions, allergies, or medical conditions, please consult with a qualified healthcare professional or a registered dietitian before making significant changes to your diet.