Imagine walking into a warm kitchen that smells like sweet vanilla and rich melted butter on a rainy afternoon. There is nothing quite like the feeling of baking something fresh that makes everyone in the house run to the kitchen with big smiles. This special recipe is all about making the ultimate chocolate chip cookie bars which are basically your favorite chocolate chip cookies but made much easier and softer. Instead of rolling out twenty different little balls of dough and watching them closely so they do not burn in the oven, you just press all the sweet dough into one single pan and bake it all at once. It is the perfect baking trick for anyone who wants that classic homemade cookie taste but does not have the time or patience to stand by the oven for an hour scooping dough. These bars come out of the oven with beautifully golden crispy edges while the absolute center stays incredibly soft, thick, gooey, and packed with melted chocolate pools.
People all over the world absolutely love this specific recipe because it combines the best parts of a chewy cookie with the thick density of a rich fudge brownie. It is a massive crowd pleaser because every single bite offers a wonderful mix of textures that pleases both kids who love sweet treats and adults who enjoy a nostalgic dessert. Another reason for its massive popularity is that it is almost impossible to mess up even if you are someone who has never baked a single thing in your entire life. You do not need any fancy kitchen tools like an expensive electric stand mixer or special rolling pins because a simple bowl and a sturdy spoon will do the job perfectly. Plus, you can easily change the recipe around by throwing in different types of chocolate or nuts depending on whatever ingredients you already have sitting in your kitchen pantry. It is truly the ultimate comfort food because it feels like a warm hug from the inside out and brings back fond childhood memories with every single delicious bite.
You should definitely make these wonderful cookie bars whenever you feel like you need a little bit of happiness after a very long and stressful week at work or school. Baking is a beautiful way to practice mindfulness and slow down because measuring out the flour and watching the sugar melt together can be deeply relaxing for a tired mind. They are also the perfect treat to bring to big family picnics, neighborhood birthday parties, holiday office gatherings, or cozy Friday movie nights with your best friends. Even if you are someone who strictly follows a fitness routine or watches your daily calories closely, making these bars is a wonderful way to reward yourself with a mindful treat. Instead of buying processed store cakes that are full of artificial chemicals, making these from scratch lets you control exactly what goes inside so you can enjoy a real dessert. Having a slice of this homemade goodness satisfies your sweet tooth completely so you do not feel restricted on your health journey.
The taste of these bars is a magical balance of deep brown sugar caramel notes mixed with the slight bitterness of high quality chocolate chips and a tiny pinch of salt. When you take your very first bite, you will experience the crunch of the outer crust followed immediately by the melt in your mouth softness of the rich dough. It is the kind of dessert that makes people stop talking for a moment because they are focusing entirely on how incredibly delicious and comforting the flavor profile is. You can serve them warm right out of the baking pan with a huge scoop of cold vanilla bean ice cream melting on top for a fancy restaurant style dessert experience. Or you can let them cool down completely so they become beautifully chewy and easy to pack into school lunchboxes or snack bags for a mid afternoon energy boost. No matter when or why you decide to whip up a batch of these sweet bars, they are guaranteed to bring warmth, joy, and comfort to your kitchen.
Ingredients You Will Need
To make these delicious cookie bars, you will need to gather a few simple ingredients that you probably already have in your kitchen. Make sure your ingredients are at the right temperature before you start so everything mixes together perfectly.
-
1 cup of unsalted butter which must be melted and cooled slightly
-
1 cup of packed dark brown sugar for a deep caramel flavor
-
half cup of white granulated sugar for the perfect crispy edges
-
2 large eggs at room temperature so they blend easily
-
2 teaspoons of pure vanilla extract for a beautiful aroma
-
2 cups and three quarters of all purpose flour measured correctly
-
1 teaspoon of baking soda to help the bars rise beautifully
-
1 teaspoon of fine sea salt to balance out the sweetness
-
2 cups of semi sweet chocolate chips divided for mixing and topping
Step by Step Method
Please read through all these steps before you begin baking so you know exactly what to expect as you move through the process. Baking is super fun when you are prepared and relaxed.
Step 1: Prepare Your Oven and Pan
First, you need to preheat your oven to 350 degrees Fahrenheit which is about 175 degrees Celsius so it is perfectly hot when your dough is ready. Take a 9 by 13 inch baking pan and grease it thoroughly with a little bit of butter or baking spray. Line the pan with a piece of parchment paper, leaving a bit of paper hanging over the long sides so you can easily lift the bars out later.
Step 2: Mix the Wet Ingredients
In a large mixing bowl, pour in your one cup of melted unsalted butter. Add the one cup of dark brown sugar and the half cup of white granulated sugar into the melted butter. Use a sturdy wooden spoon or a hand whisk to stir these ingredients together very well until no lumps of brown sugar remain and the mixture looks like smooth wet sand.
Step 3: Add the Eggs and Vanilla
Crack your two large room temperature eggs directly into the sugar and butter mixture one at a time, stirring vigorously after each addition. Pour in the two teaspoons of pure vanilla extract. Keep whisking the mixture for about one full minute until it becomes slightly pale in color and very smooth, which ensures your bars will have a beautiful shiny top crust.
Step 4: Combine the Dry Ingredients
In a separate medium bowl, whisk together the two cups and three quarters of all purpose flour, the one teaspoon of baking soda, and the one teaspoon of fine sea salt. Gradually pour this dry flour mixture into your wet ingredients bowl. Use a large spatula to gently fold the mixture together just until the flour disappears, being careful not to overmix the dough so the bars stay tender.
Step 5: Fold in the Chocolate Chips
Pour one cup and a half of the semi sweet chocolate chips into your cookie dough. Gently fold them in with your spatula so they are spread out evenly throughout the thick dough. The dough will be very thick and sticky at this point, which is exactly how it is supposed to look.
Step 6: Press into the Pan
Transfer the thick cookie dough into your prepared baking pan using your spatula to scrape down the sides of the bowl. Use your clean hands or the back of a metal spoon to press the dough evenly into all four corners of the pan. Sprinkle the remaining half cup of chocolate chips over the top of the dough and press them down gently so they stick.
Step 7: Bake to Perfection
Place the pan on the center rack of your preheated oven and bake for about 20 to 25 minutes. You will know they are done when the edges turn a beautiful golden brown color and start to pull away from the sides slightly, while the center still looks a little bit soft. Do not overbake them if you want that amazing chewy texture in the middle.
Step 8: Cool and Slice
Remove the pan from the oven and set it on a wire cooling rack. Let the bars cool down completely inside the pan for at least 30 minutes because they will continue to firm up as they sit. Once cooled, use the parchment paper handles to lift the entire block out of the pan, place it on a cutting board, and use a sharp knife to cut them into twenty even squares.
Why This Recipe Is Special
This recipe stands out from standard cookie recipes because it saves you an incredible amount of time while delivering a far superior texture. You do not have to worry about the dough spreading out too much on a flat baking sheet or turning into thin crispy wafers. By baking the dough closely together in a single pan, the moisture is trapped inside which creates a unique texture that stays soft and fresh for several days. It is also an excellent base recipe meaning you can use it as a canvas to express your own baking creativity whenever you want.
From a health perspective, making these at home means you are avoiding the bad preservatives, hydrogenated oils, and artificial coloring found in commercial store snacks. You can easily swap the all purpose flour for a whole wheat pastry flour or a gluten free flour blend to suit your dietary needs. Using dark chocolate chips instead of milk chocolate adds beneficial antioxidants to your treat which is great for your heart health. It is a wonderful way to enjoy a real dessert made with simple whole foods that you can easily recognize and feel good about serving to your family.
The taste profile is truly exceptional because of the higher ratio of brown sugar to white sugar which introduces a deep molasses flavor. This molasses interacts beautifully with the sea salt to create a salted caramel undertone that makes the chocolate taste even richer. Every single bite delivers a wonderful contrast between the crispy baked top skin and the ultra fudgy center. It satisfies all your dessert cravings in one single square making it a legendary recipe you will want to keep in your family recipe box forever.
Extra Tips for Better Taste
If you want to take these chocolate chip cookie bars to an absolute professional level, you can try browning your butter before mixing it into the sugar. To do this, melt the butter in a saucepan over medium heat, swirling it gently until it begins to foam and turns a lovely amber color with a nutty aroma. This simple trick adds a spectacular toasted nutty flavor to the dough that pairs incredibly well with dark chocolate.
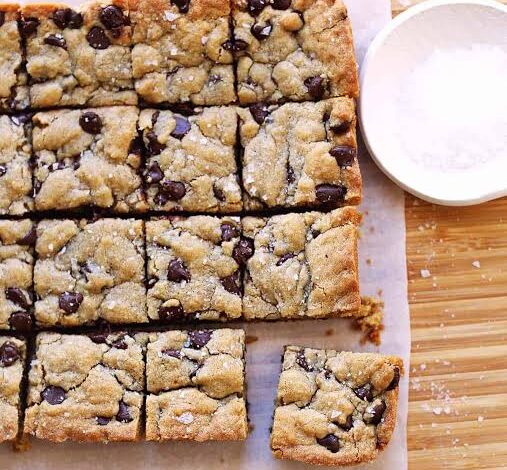
Another amazing tip is to sprinkle a light dusting of flaky Maldon sea salt across the top of the bars immediately after you pull them out of the hot oven. The large salt flakes provide a gorgeous visual contrast and burst on your tongue to cut through the rich sweetness of the chocolate. You can also experiment with your mix ins by replacing half of the chocolate chips with chopped toasted pecans, walnuts, or even crushed pretzel pieces for an extra crunch.
Always make sure you do not overbake these bars because a dry cookie bar is a sad sight. It is always better to pull them out when the center still jiggles just a tiny bit because the residual heat from the hot baking pan will finish cooking the center perfectly while keeping it fudgy. Lastly, if you can manage to wait, letting the cut bars sit in an airtight container overnight actually deepens the flavors and makes them even chewier the next day.
Final Thoughts
Baking does not have to be complicated or stressful to be absolutely delicious, and these chocolate chip cookie bars are the perfect proof of that. They bring all the warmth, sweetness, and comfort of traditional cookies with only a fraction of the actual effort and time required. Gathering your loved ones around a warm pan of bars is a beautiful way to create lasting memories and share simple moments of pure joy. Grab your mixing bowl, turn on your oven, and enjoy the wonderful process of creating this sweet treat from scratch.
Nutrition Details
Here is the estimated nutritional information for one serving of these homemade cookie bars. This recipe makes twenty servings in total.
| Nutrient | Amount Per Serving |
| Calories | 240 calories |
| Total Fat | 11 grams |
| Saturated Fat | 7 grams |
| Cholesterol | 35 milligrams |
| Sodium | 140 milligrams |
| Total Carbohydrates | 32 grams |
| Dietary Fiber | 1 gram |
| Sugars | 20 grams |
| Protein | 3 grams |
Disclaimer
Please remember that everyone has a unique body with different nutritional needs, health goals, and metabolic rates. The nutrition facts provided above are general estimates calculated using standard ingredients and values may change depending on the specific brands you choose to buy. If you have specific health conditions, food allergies, or strict dietary restrictions, please consult with a professional doctor or a registered dietitian before making changes to your diet. Enjoy your treats mindfully as part of a balanced lifestyle.